Karin’s Darling Daffodils Card and Coordinating Table Decor

Happy Monday! Karin is with us today with beautiful Spring creativity featuring Darling Daffodils!


How beautiful is this card and napkin ring combo? Such a fantastic way to add a bit of Spring to your table!


Karin’s stunning card starts with white cardstock and Distress Inks. She blended the rich colors on the Darling Daffodils then she arranged them on a stunning ink-blended backdrop!


The greeting is from Wavy Sayings and Karin stamped it on a Fancy Wavy Banner!


I love this simple design! Karin tied up a cloth napkin with rustic twine before tucking in the pretty daffodil! The personalized Tiny Tag makes this perfect for an Easter gathering or Springtime celebration!

Thank you so much for sharing your gorgeous creativity with us, Karin!

Supplies:

Thanks so much for visiting, have an amazing day!

Lawn Fawn Video {1.28.23} A Fun Beaver Dam Scene with Samantha

Happy Saturday, friends! Samantha joins us today to share another creative card idea! This time she made a fun beaver dam scene with Wood You Be Mine. You can watch the video tutorial below or click HERE to watch at our YouTube channel.

Thank you so much for watching!

In the video, Samantha gives us a little water coloring tutorial with Zig Clean Color Real Brush markers. Its a quick and easy method for adding color to stamped images. For this card, she did some ink-blending with Distress Oxide inks. She used Stitched Hillside Borders for the water and Grassy Border for the riverbank.

As a final embellishment, Samantha white heat embossed her sentiment on a vellum Fancy Wavy Banner! It’s the perfect finishing touch to a cute design!

Thank you so much for this sweet inspiration, Samantha!

Supplies:

Thank you so much for visiting, have an amazing day!

Grace’s Charming Cards are Just Peachy!

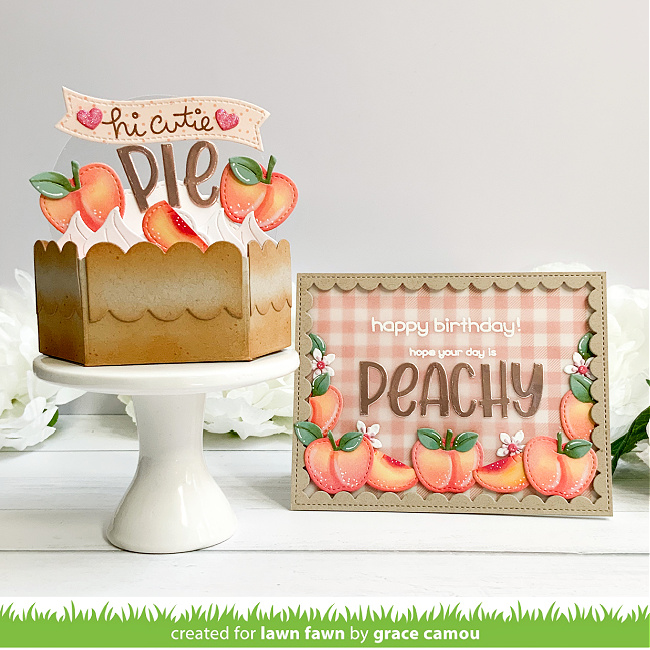
Grace joins us today with another beautifully innovative project! She shares a peachy-keen pair of cards using the apples from Build-A-Barrel: Apple. So much cleverness!

These fresh and fun cards are so perfect for sending happy mail to a friend who’s a real “peach”!

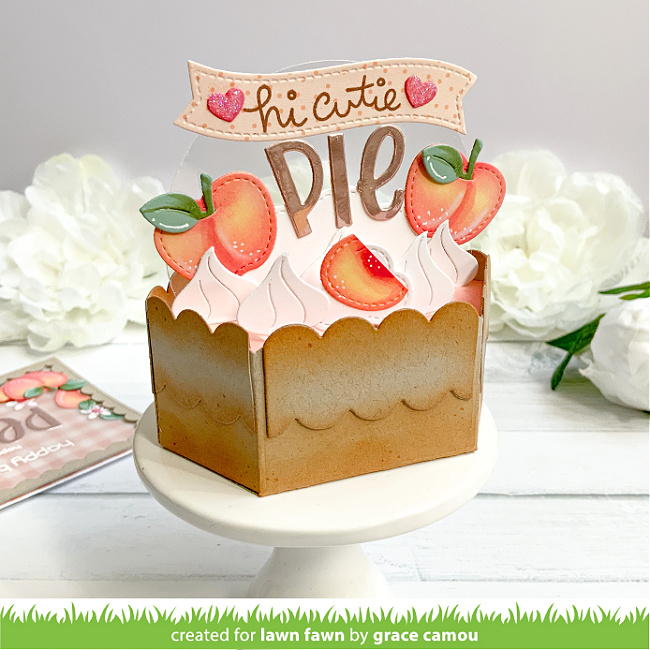
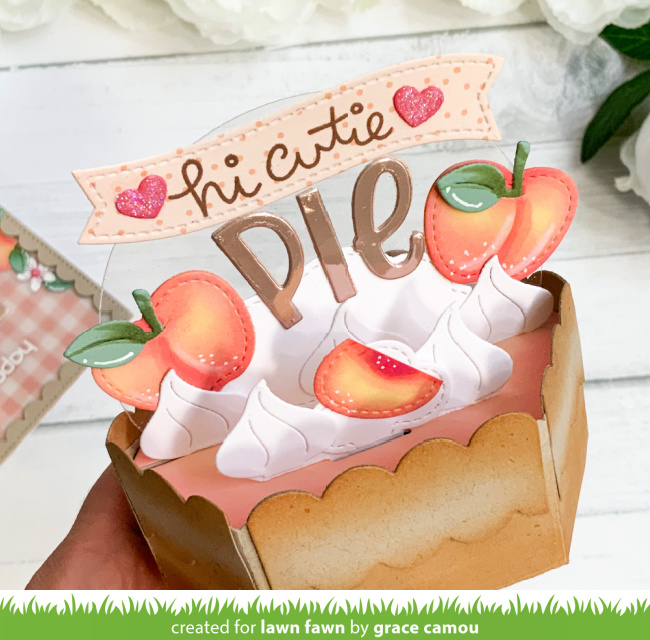
Grace’s peach pie Platform Pop-Up is so clever! She used the Cake Slice Box Pie Add-On for the pie crust and dollops of whipped cream! To add another layer of whipped cream, Grace added the treetop from Tree House behind the greeting.

Grace used the inside circle after die cutting the largest Stitched Circle Frame to mount the greeting and peaches to the center of her Platform Pop-Up. Henry’s ABCs in Rose Gold metallic cardstock is so pretty and complements the colors of the “peach pie” so well! The rest of the sentiment from Cutie Pie is stamped on a Fancy Wavy Banner.

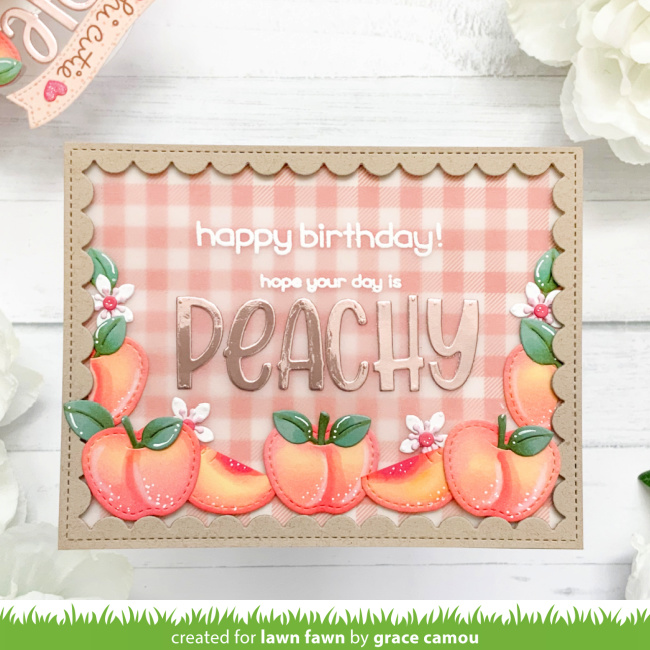
Wow, how beautiful is this peachy card! Grace started with a Gotta Have Gingham Rainbow panel with a vellum panel layered over the top. She framed this with a Reverse Stitched Scalloped Rectangle Window in kraft cardstock. Then she filled in with more peachy goodness and another Rose Gold greeting. This time she included a sentiment from Birthday Before ‘n Afters.

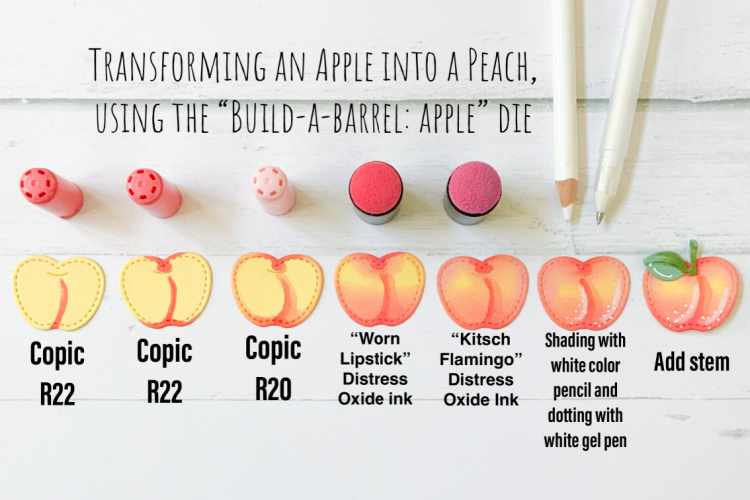
Here, Grace shares the magic process for turning apples into peaches! She started with Sticky Note cardstock to cut the apple shapes. Then with some clever shading with Copic markers and Distress Oxide ink the peach emerges. As a final touch, Grace used white pencil and white gel pen to add more shading and detail. Then just pop the stem on top for the sweetest peach ever!

Thank you so much, Grace for sharing these amazing card designs with us today!
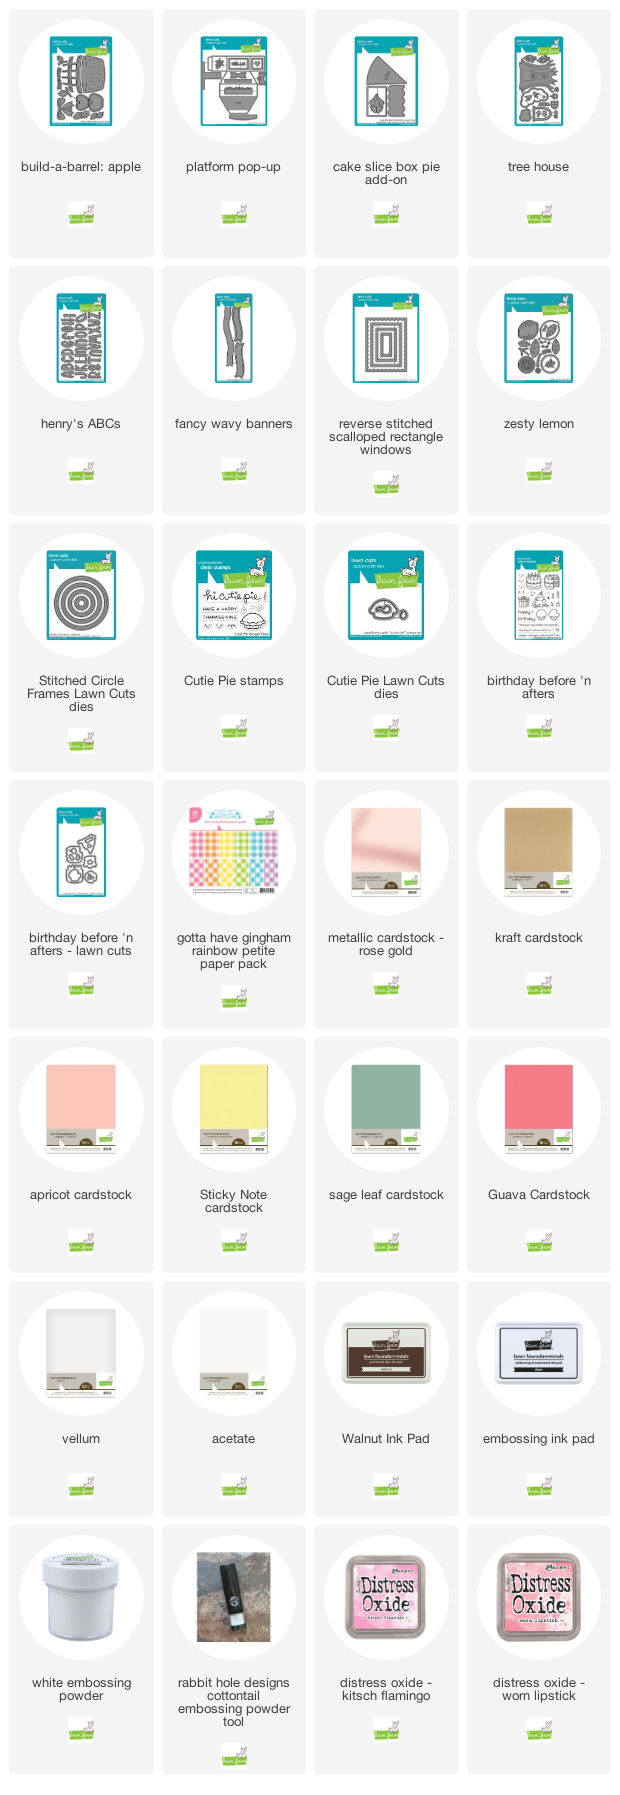
Supplies:

Thanks so much for visiting!
Have an amazing day!