Don’t forget to join us tomorrow, Saturday March 13 at 10:00AM PST at Lawn Fawn’s Facebook page for our LIVE mini class and birthday celebration chat! Click HERE for all the details!
It’s time for another amazing 1 Stamp, 3 Ways with Tammy! I know you will be inspired!
Hi friends! I’m back this month with another 1 Stamp, 3 Ways. Since Easter is right around the corner, this month I’m featuring Eggstra Amazing Easter.
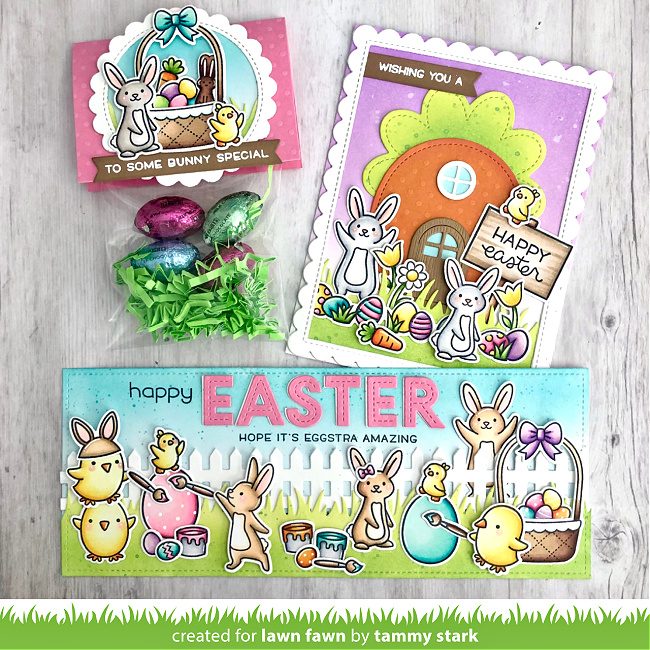
Slimline Card
First up is a slimline, Easter egg painting scene!
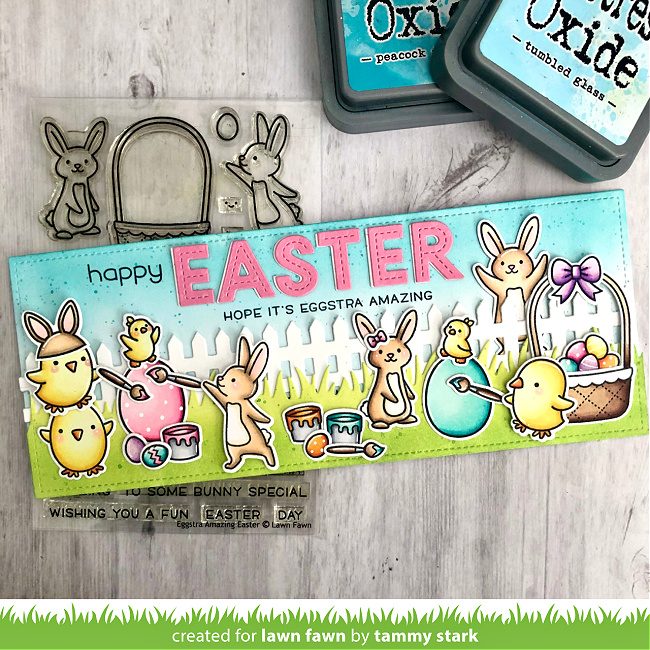
To create this fun slimline card, I began by cutting Bristol cardstock using the Large Slimline with Sliders. I inked it with Peacock Feathers and Tumbled Glass Distress Oxide inks, then splattered some Peacock Feathers, thinned with water, onto the background to create a bit of interest. Next, I cut a white Picket Fence Border and attached to the background. The grass was created using the Grassy Border, ink blended with Twisted Citron and Mowed Lawn inks, and attached to the bottom of the background.
I stamped, colored with Copic markers, and die cut images from the following sets:
Eggstra Amazing Easter/ Coordinating Dies
Chirpy Chirp Chirp/ Coordinating Dies
Next, I created the sentiment by cutting the word “Easter” from Textured Dot Cardstock – Pastels and White Cardstock using Oliver’s Stitched ABCs , layering them just slightly offset. I then stamped the sentiment from Eggstra Amazing Easter in Jet Black Ink. Lastly, I arranged the colored images onto my card, attaching some with foam tape for dimension to complete my first card.
Treat Bag Toppers
I love creating special treats or gifts for friends and family for the holidays, and these bag toppers are so easy and fun to make!
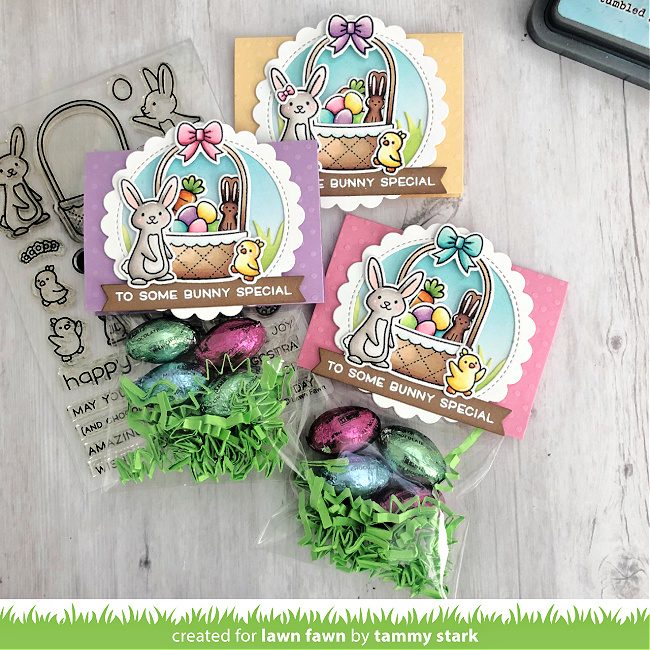
I began by cutting the Textured Dot Cardstock – Pastels to 3 X 5, scoring and folding them in half lengthwise. Next, I cut 3 white Stitched Scalloped Circle Frames and 3 circles using the second to largest die from the Large Stitched Circle Stackables. I lightly inked each circle with Peacock Feathers, then attached a Grassy Border before placing the scalloped frame on top.
I stamped, colored with Copic markers, and die cut images from the following sets:
Eggstra Amazing Easter/ Coordinating Dies
Some Bunny (carrot)/ Coordinating Dies
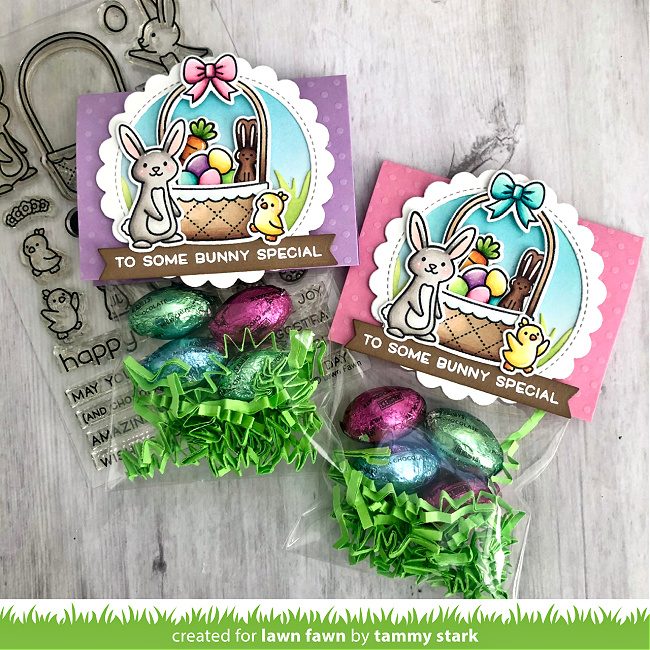
I arranged the colored images onto each scalloped circle, adhering some with foam tape for dimension, then attached them to the folder bag toppers. Using White Embossing Powder, I heat embossed the sentiment from Eggstra Amazing Easter onto Paper Bag Cardstock, then die cut with the Everyday Sentiment Banners and attached to the bag toppers.
Lastly, I filled little cello bags with green shreddies and candy eggs, then added ¼” Double-Sided Tape to the back of the toppers to complete my project!
Carrot House
My last project features this adorable Carrot House, custom made from a few dies.
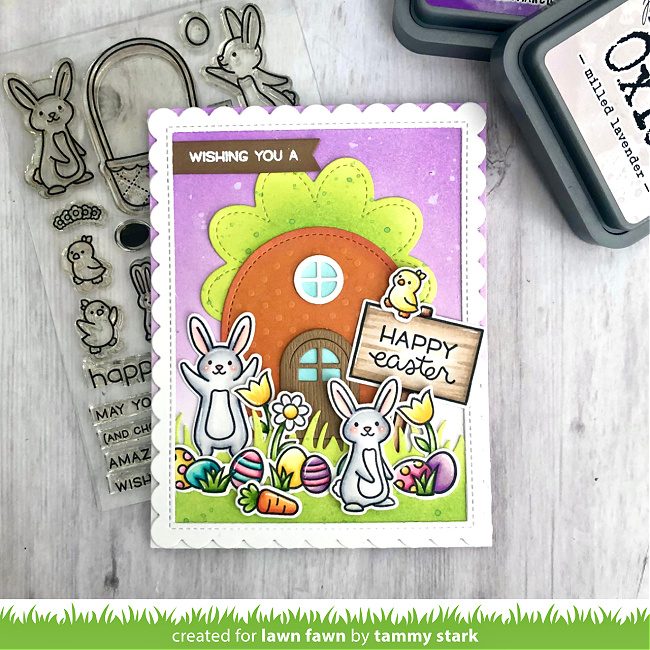
First, I cut a piece of Bristol smooth cardstock using the Large Stitched Rectangle Stackables, and ink blended it with Wilted Violet and Milled Lavender Distress Oxide inks. I splattered some water onto the background with a paintbrush for a bit of interest. Next, I cut a Grassy Border and ink blended with Twisted Citron and Mowed Lawn inks and attached to the bottom of the background, then framed my card with a white Stitched Scalloped Rectangle Frame.
I stamped, colored with Copic markers, and die cut images from the following sets:
Eggstra Amazing Easter/ Coordinating Dies
Some Bunny (carrot)/ Coordinating Dies
Simply Celebrate Spring/ Coordinating Dies
Open Me/ Coordinating Dies
Oh Gnome/ Coordinating Dies
Say What? Spring Critters (“Happy Easter” sentiment on sign)
Directions for Making the Carrot House
Next, I created the carrot house. Using the second largest die from the Outside In Easter Egg Stackables, I die cut the orange paper from the Textured Dot Cardstock – Brights to create the “carrot”. The door (cut from Woodgrain Cardstock) and window are from the Mushroom House, and the carrot top was created with the Outside In Stitched Flower. I ink blended the flower with Twisted Citron and Mowed Lawn inks, snipped off a portion of the petals, and attached to the back of the carrot.
The completed carrot house and colored images were then arranged and attached onto the card.
Using White Embossing Powder, I heat embossed the sentiment from Eggstra Amazing Easter onto Paper Bag Cardstock, then die cut with the Everyday Sentiment Banners and tucked under the scalloped frame to finish up my card.
See you next month for another 1 Stamp, 3 Ways. As always, we LOVE your suggestions and ideas for upcoming features. Are there any fun things you would like to see created with dies? Or any stamp sets you would like to see featured? Please leave your suggestions in the comments below!
Big Hugs, Tammy
Thank you so much for sharing this delightful trio of Eggstra Amazing Easter projects, Tammy! I love them all!
Supplies:

Thanks for visiting!
Have an amazing day!

I simply love the pastel palette. The treat bag tippers are definitely something I will need to try. Super cute Tammy. 🐣
These are sooooo Adorable!!!
I am just bowled over by the extreme, lovely, cuteness of each card!
Tammy’s creations are always the sweetest. NO Bunny does it Better!
These are just adorable … I love this feature that Tammy does!
Love those bunnies! Great ideas!