Hello and welcome to Lawn Fawn’s Lots of Heart Inspiration Week! Our 2026 Valentine release is available at your favorite store and at www.lawnfawn.com! Woohoo!
We have planned a special Lots of Heart Inspiration Week to highlight our new Valentine sets and of course favorite older sets too! As always there will be amazing design team samples, inspiring videos and daily giveaways!
Daily Giveaway
We already have four places you can leave comments to win:
Our big giveaway post!!
Day 1 post!
and Day 2 post!
also, Day 3 post!
AND today’s post too!
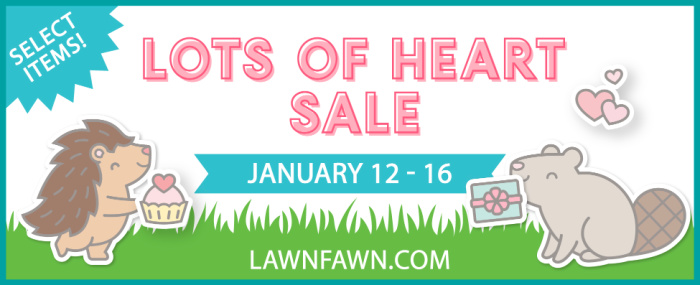
And don’t miss our special Lots of Heart Sale this week! You will find select love, heart and Valentine themed items on sale January 12 – 16! Visit the Lawn Fawn shop and fill your cart with Lots of Heart!
Mindy’s Ta-Da! Diorama! Video Tutorial
Mindy created a fun Ta-Da! Diorama! card with Candy Hearts Stencils and Critter Conversation Hearts! It’s super cute and perfect for Valentine’s Day! You can watch the video tutorial below or click HERE to watch at our YouTube channel.
Thanks so much for watching!
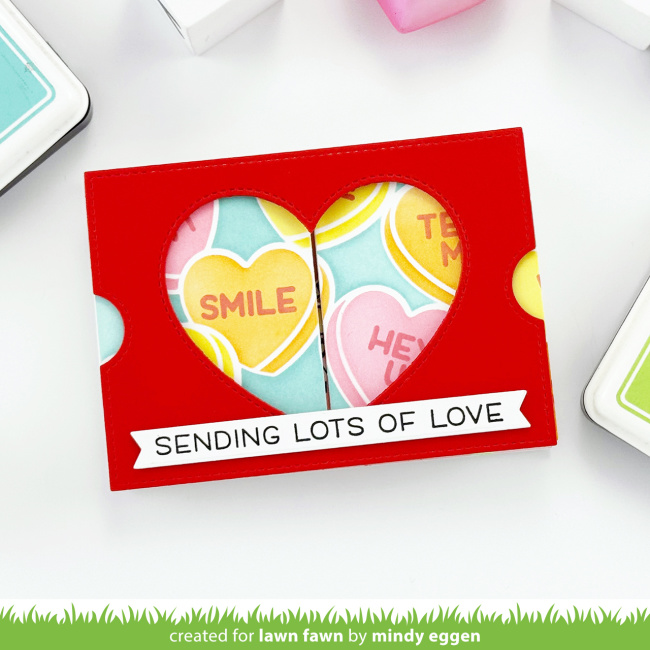
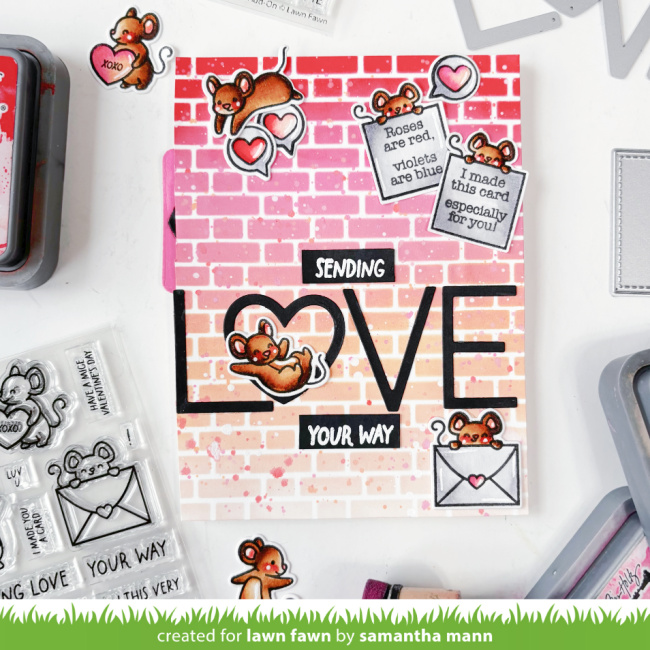
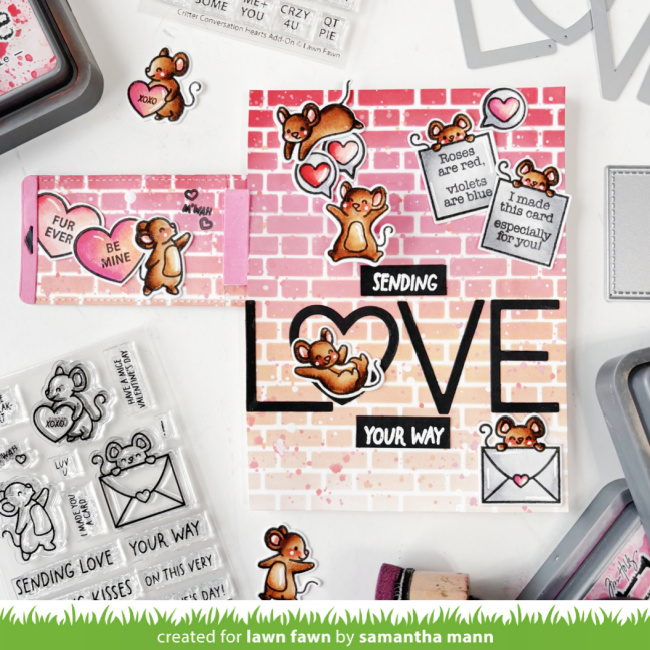
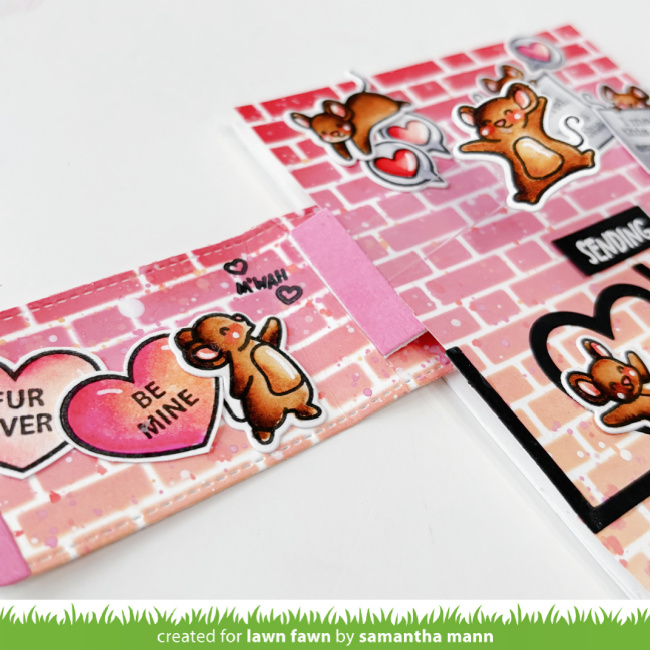
Mindy used Ta-Da! Diorama! with the Heart Window Add-On to create this cheerful interactive Valentine card! She added a Candy Hearts Stencils background behind the heart window that gives it the wow factor! Then she stamped a sentiment from Simply Celebrate Hearts on an Everyday Sentiment Banner.

When you pull open the diorama “doors”, a cute little scene featuring Critter Conversation Hearts is revealed! So sweet! In the video, Mindy shows a great tip for using Critter Conversation Hearts Coloring Stencils.
More amazing Valentine inspiration by the Design Team!
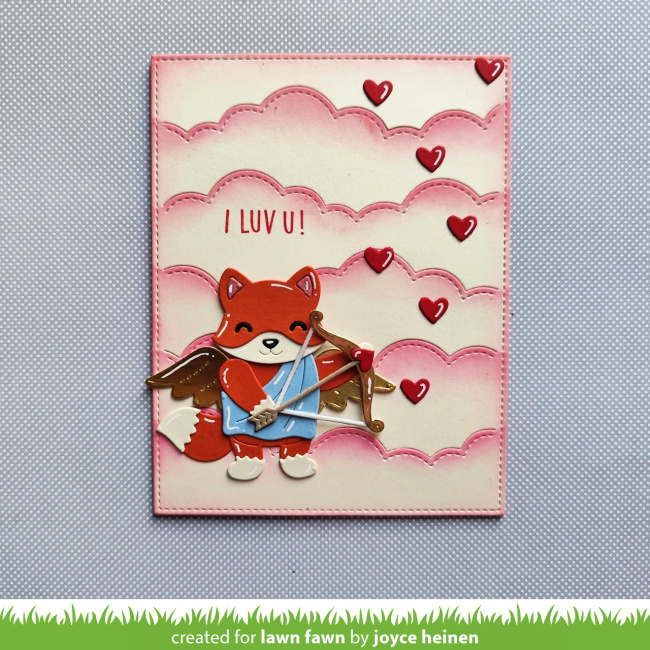
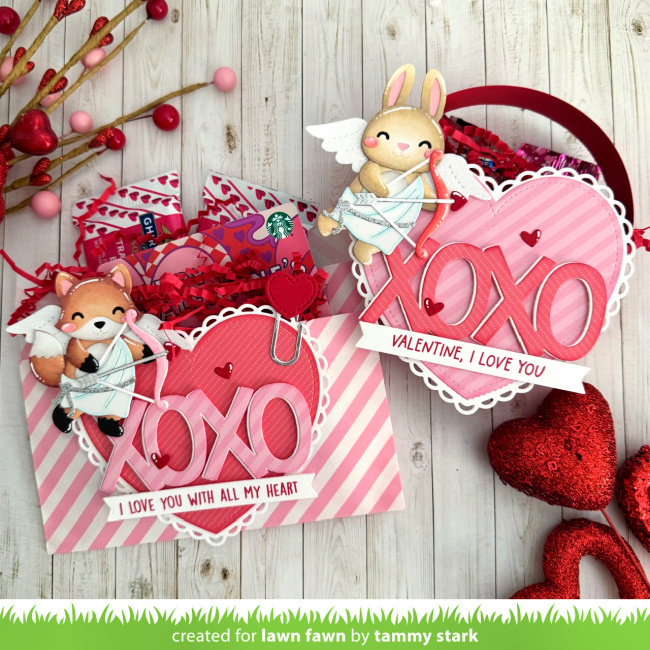
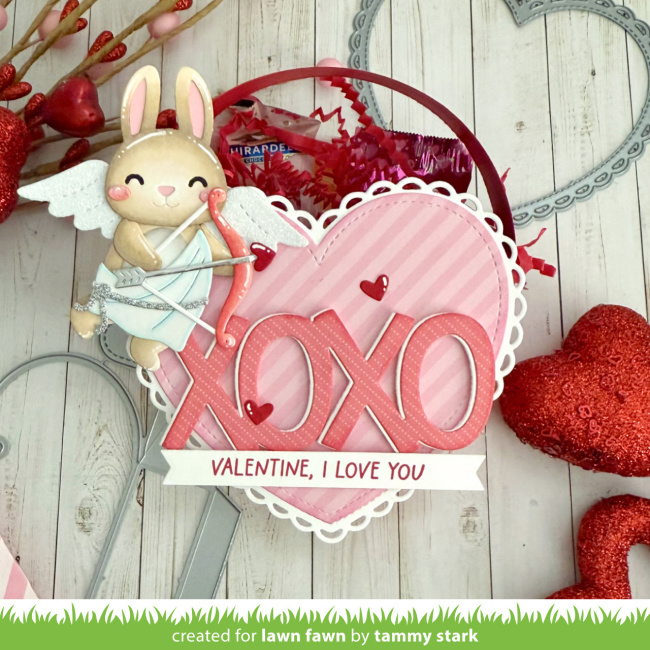
Joyce sends a short and sweet greeting from Critter Conversation Hearts in her darling design! She dressed Build-A-Fox in the cupid toga from Build-A-Critter Valentine Accessories so he’s ready to send lots of hearts! I love how she inked the edges of the Puffy Cloud Backdrop: Portrait.
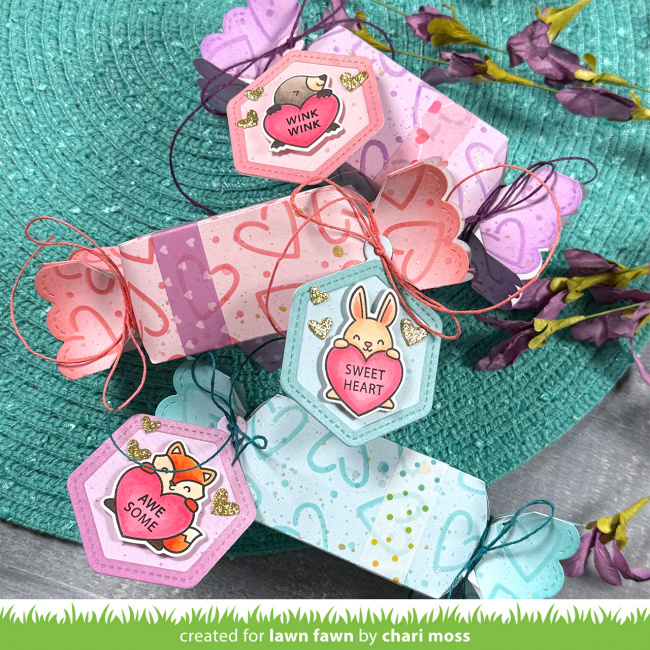
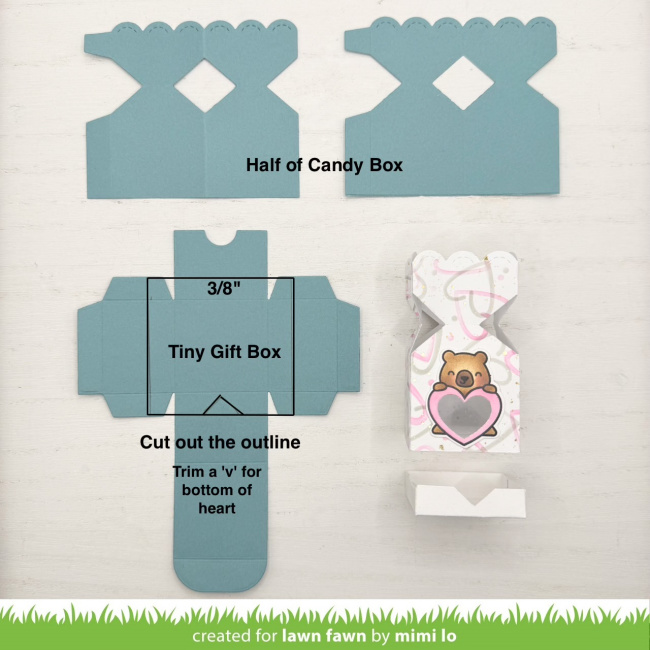
Chari‘s Candy Box treats are so special! She started with three colors of Spiffy Speckles patterned paper, Strawberry Frosting, Blueberry Smoothie and Seafoam to cut out the Candy Box pieces. Then she added the Outline Hearts Stencil in coordinating ink colors. She assembled the boxes and added cute washi tape strips as a fun embellishment.
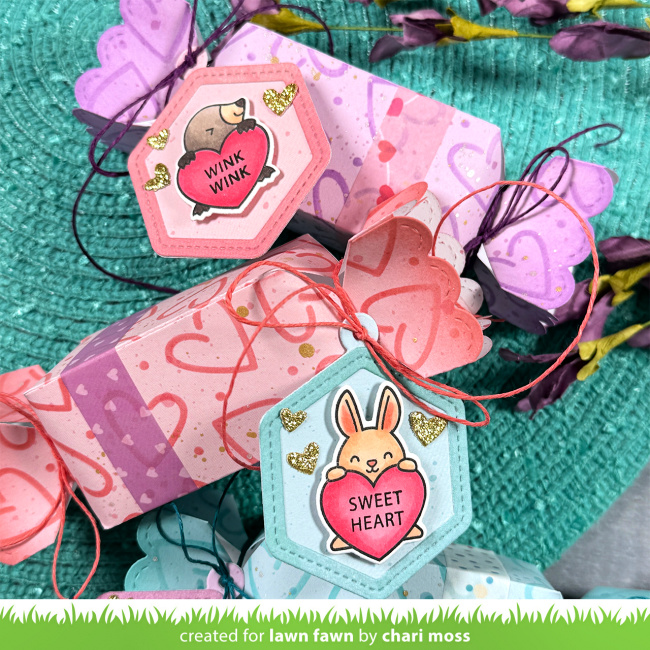
The tags are such an adorable addition too! Chari used the Honeycomb Shaker Gift Tag with Watercolor Wishes papers. Then she added the cute Critter Conversation Hearts and gold sparkle hearts from Hearts and Stars Skinny Tag.
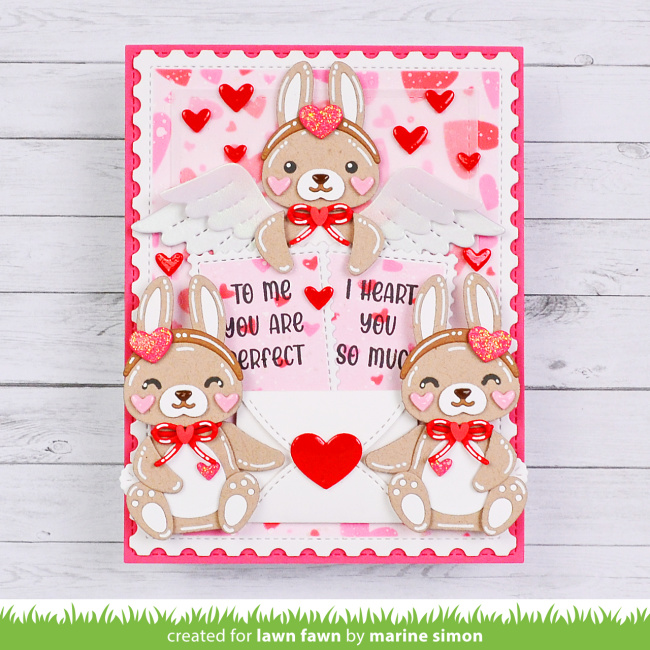
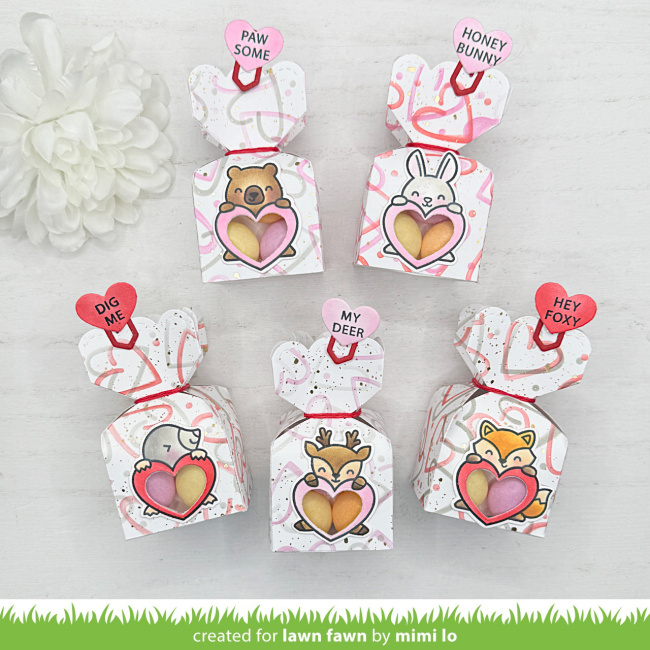
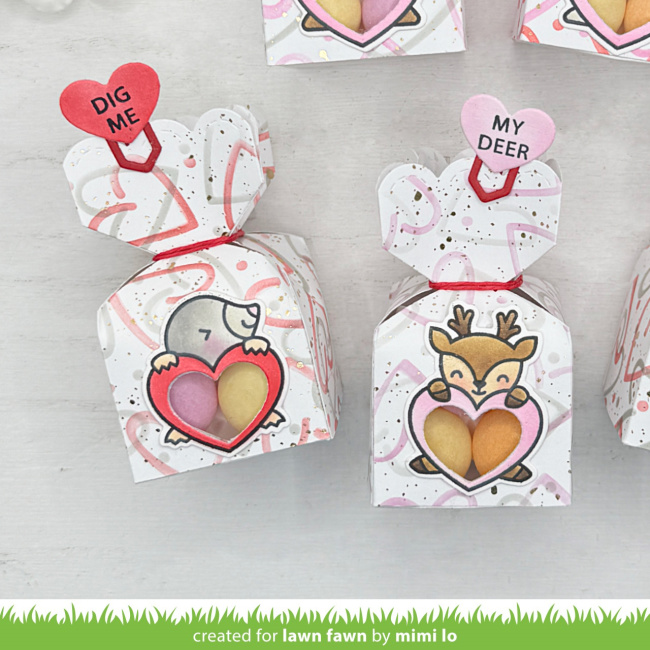
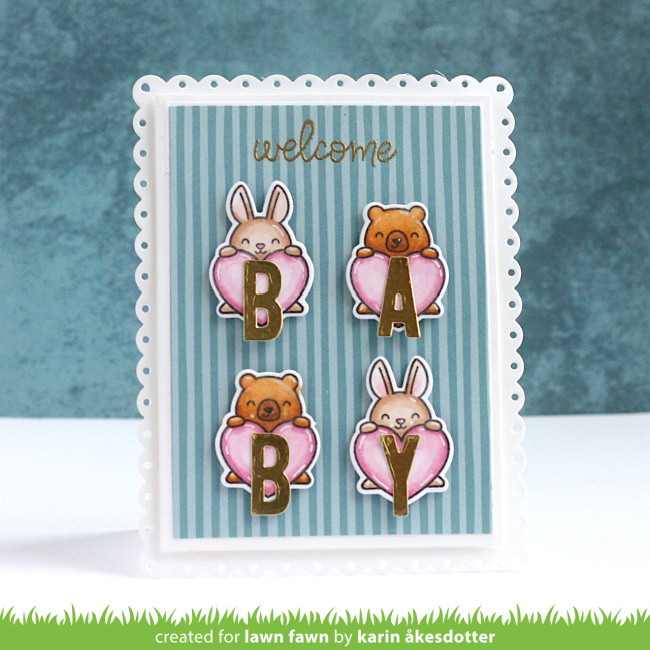
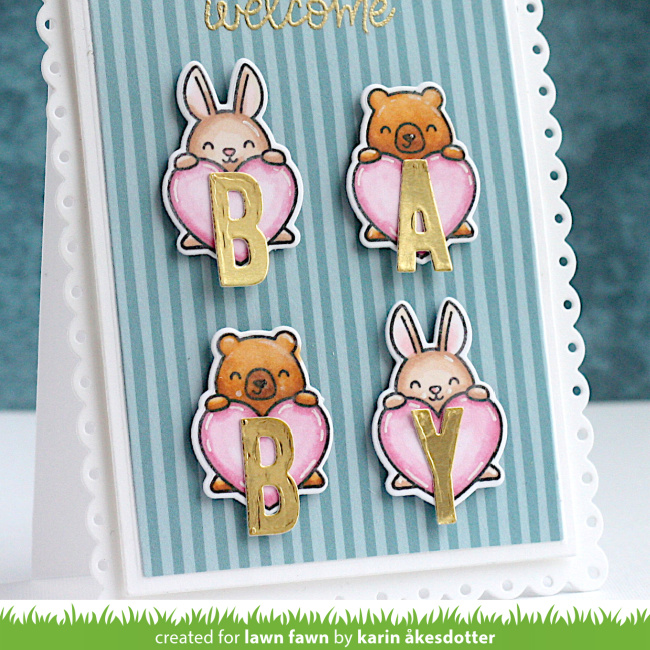
Marine‘s Build-A-Bunny card is filled with so much Valentine cuteness! She adorned a trio of Build-A-Bunny critters with Build-A-Critter Valentine Accessories, Christmas Accessories and Winter Accessories. She added Little Letters stenciled with Falling Hearts then stamped with sayings from Henry’s Build-A-Sentiment: Love.

For the background, Marine started with a Postage Rectangle stenciled with Lots of Hearts Background Stencils! She layered a vellum Stitched Rectangle, then she assembled all the pieces with even more hearts!
Giveaway Time
I hope we have inspired you to make fun Valentine/heart theme cards with our new Valentine Release! Tomorrow we will have more inspiration for you, but for now, it’s giveaway time! Leave us a comment on this post by January 16th at 5:00pm ET. We will randomly pick one winner to receive a stamp set with coordinating die set along with a petite paper pack of their choice. Make sure to come back tomorrow, Friday, January 16th for our next inspiration week post!
Supplies:
Thanks so much for visiting the Lawn Fawn blog, have an amazing day!