Happy Friday fawny friends! It’s time for another 1 Stamp, 3 Ways with Tammy! This month Tammy chose Ocean Shell-fie and created three amazing card designs to inspire you! She included a special photo tutorial to make your own pirate ship! Aargh!
Hi friends, Tammy here with a fun, underwater- themed 1 Stamp, 3 Ways feature! This month, we are featuring Ocean Shell-fie. I absolutely love creating ocean themed and underwater cards, so I really had fun creating with these ocean cuties!
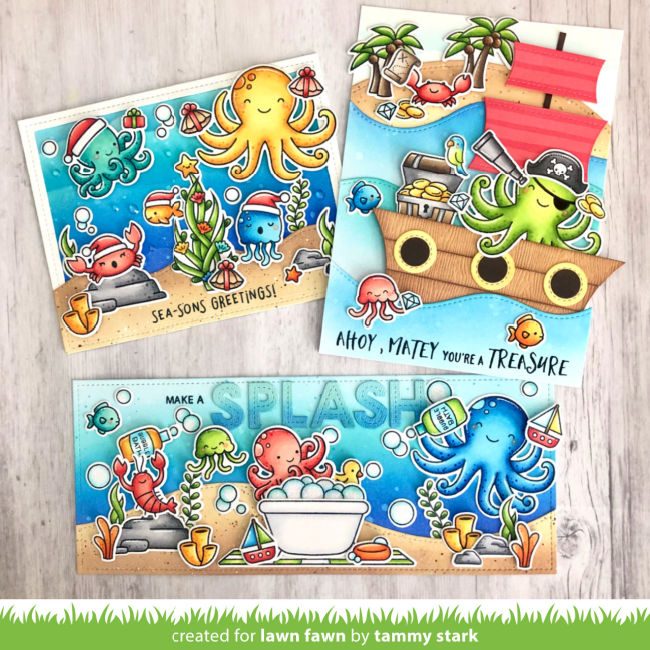
Pirate Ship Card
Ahoy Mateys!! I just love this treasure-seeking octopus-pirate! It looks like he found the treasure, but left the little crab behind, lol!
My first card is A6 size, measuring 4 ½ X 6 ¼”. It features a custom Pirate Ship that I will show you how to create using Lawn fawn dies.
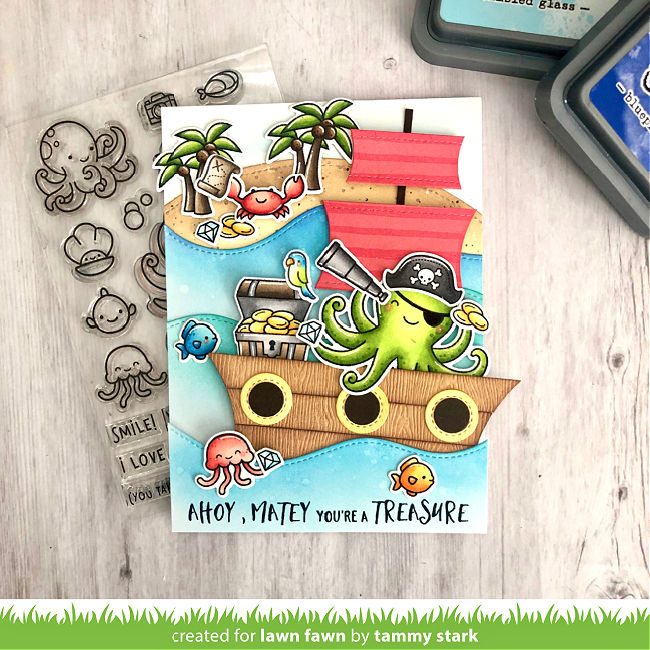
To begin, I cut a panel of Bristol smooth cardstock to 4 ½ X 6 ¼”. Using the Cloudy Stencil I very lightly inked the sky with Tumbled Glass Distress Oxide ink. Next, I cut the sandy hill using the Simple Stitched Hillside Borders. And then, I ink blended it with Antique Linen and Vintage Photo. Using the Stitched Simple Wavy Borders, I cut three waves that were lightly with Mermaid Lagoon and Peacock Feathers. I attached the sandy hill, then layered the wave borders. To pop up the front wave I used foam tape.
Using Jet Black ink I stamped the following images:
Ocean Shell-fie/ Coordinating Dies
Ahoy, Matey/ Coordinating Dies
Booyah (pirate hat and eye patch)/ Coordinating Dies
Life is Good (crab)/ Coordinating Dies
Super Star (telescope)/ Coordinating Dies
Then I colored them with Copic markers, and die cut using the coordinating dies.
Creating the Pirate Ship
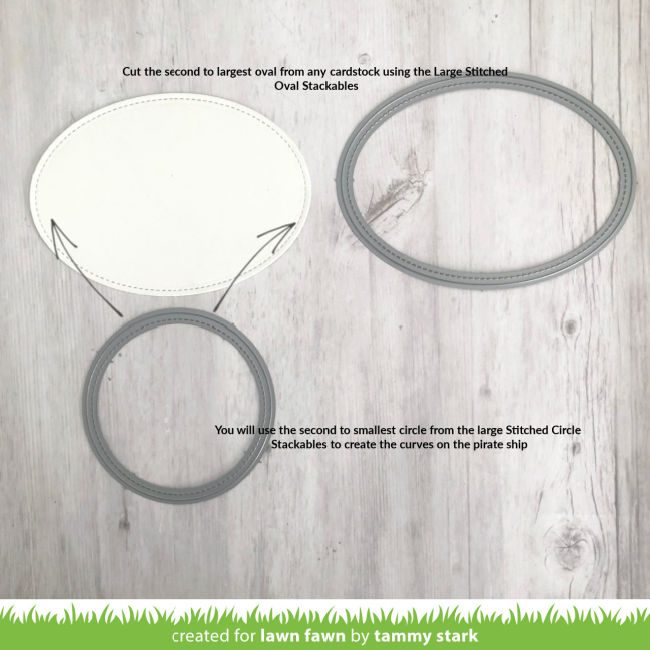
To begin, I cut an oval using the second to largest oval in the Large Stitched Oval Stackables set.
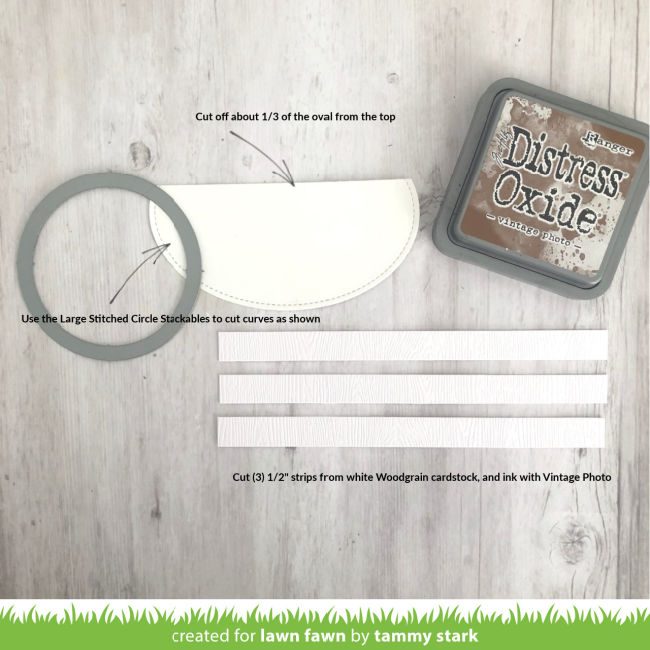
Next, I cut about 1/3 off of the oval from the top to create a straight edge. Using the second smallest circle from the Large Stitched Circle Stackables, place it on the edge and run it through your die cut machine, to create the curves on the Pirate Ship. Repeat on the other side.
To add detail to the ship, cut (3) ½” strips from the Woodgrain Cardstock – Neutrals. I added color to the strips with Vintage Photo Distress ink, to create the wood planks.
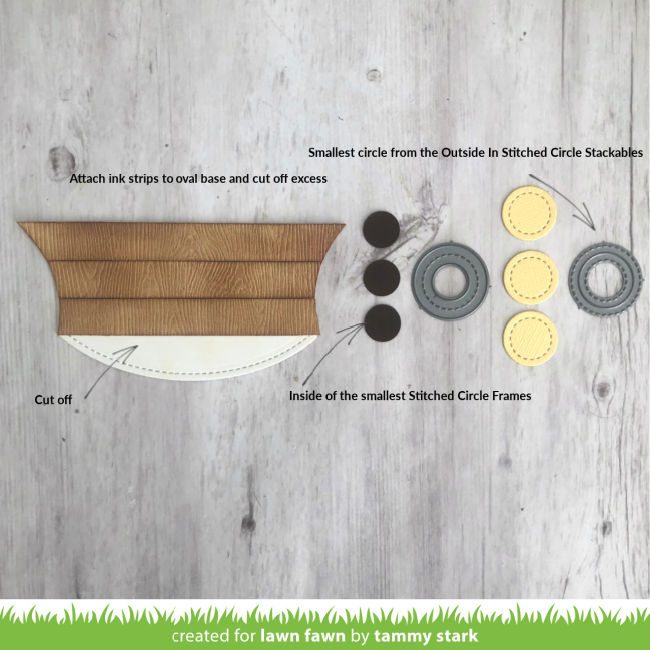
Starting from the top, attach the inked strips to the oval base. And then trim off the excess, following along the curves of the ship (as shown in pic). Next, using Ground Coffee Cardstock, cut 3 circles using the smallest die from the Stitched Circle Frames. Then, I cut 3 circles using the smallest die from the Outside In Stitched Circle Stackables from Shimmer Cardstock – Pastel. I layered the circles and attached to the ship.
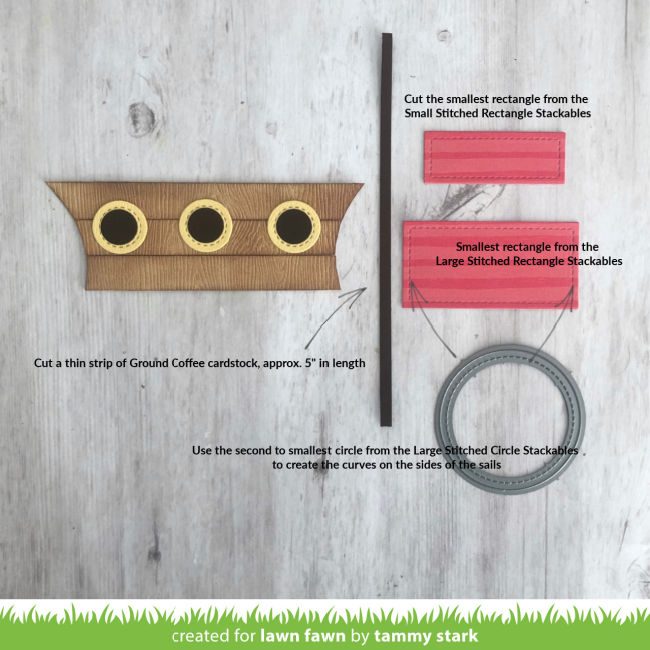
Next, cut a thin strip of Ground Coffee cardstock, approximately 5” in length. To create the sails, I cut two rectangles using the red patterned paper from the Really Rainbow Petite Paper Pack. To make the sails, I used the rectangle dies noted in the photo above. Using the second to smallest circle from the Large Stitched Circle Stackables, I created the curves on the sails.
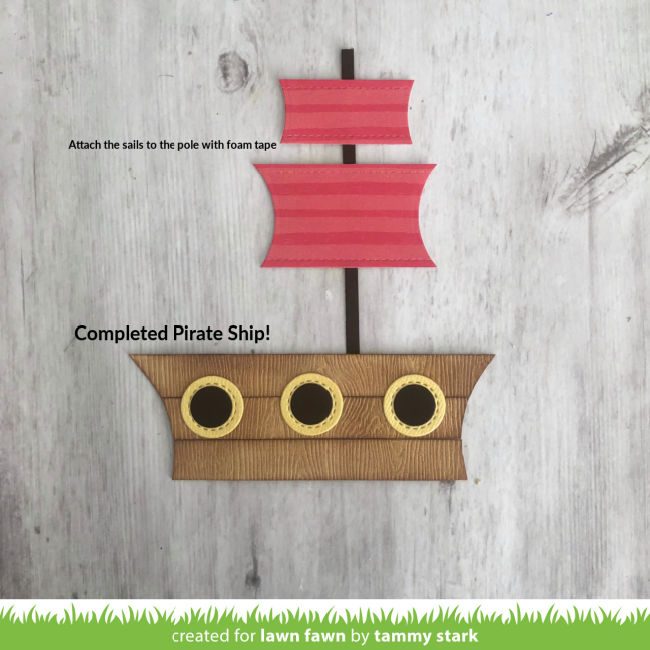
I assembled the mast and sails and then attached them to complete the ship.
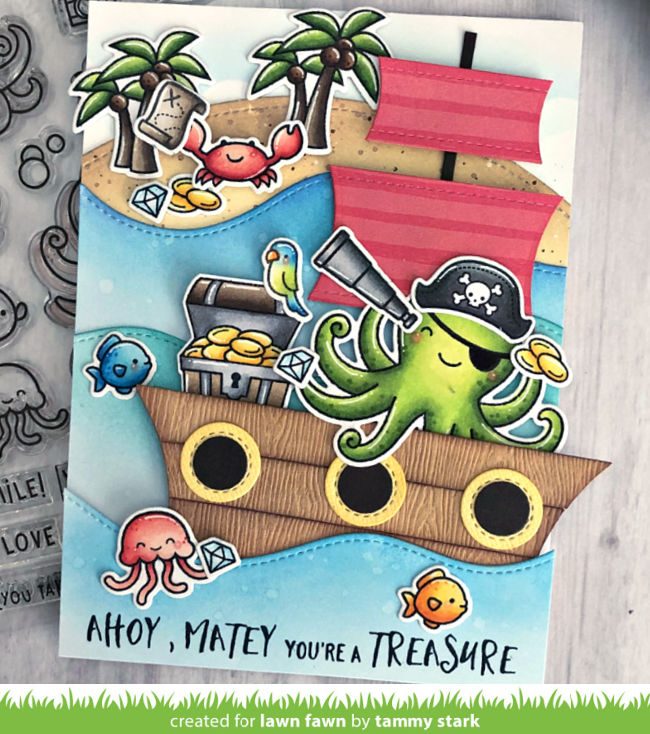
And now that the Pirate Ship is complete, we can finish up our card. I tucked the ship underneath the wave at an angle using foam tape. Next, I attached all the colored images to my card, using foam tape on some for dimension. Lastly, I stamped the sentiment from Ahoy, Matey along the bottom of my card in Black Licorice Ink.
Slimline Card
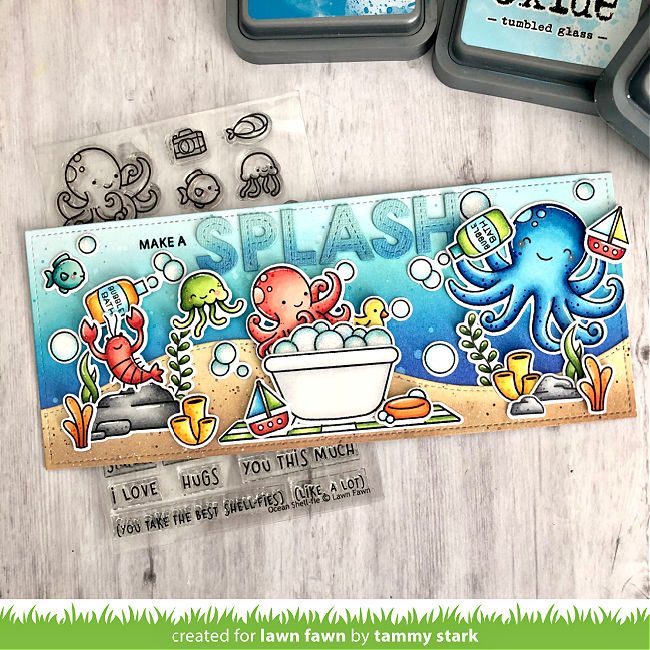
To create this fun slimline card, I cut a piece of Bristol smooth cardstock using the Large Slimline with Sliders. I inked the background with Blueprint Sketch, Mermaid Lagoon, and Tumbled Glass distress oxide inks. To add some interest, I splashed a little water and thinned down Mermaid Lagoon onto the inked background. To create the sand, I inked the Slimline Stitched Hillside Borders with Antique Linen and Vintage Photo. Then I attached it to the bottom of my inked background.
Next, I stamped, colored with Copic markers, and die cut images from the following sets:
Ocean Shell-fie/ Coordinating Dies
You are Sublime ( lobster, coral)/ Coordinating Dies
Rub-a-Dub-Dub/ Coordinating Dies
Crazy Antics (bath mat)/ Coordinating Dies
Mermaid For You (rock)/ Coordinating Dies
Offset Sayings: Birthday (sentiment)
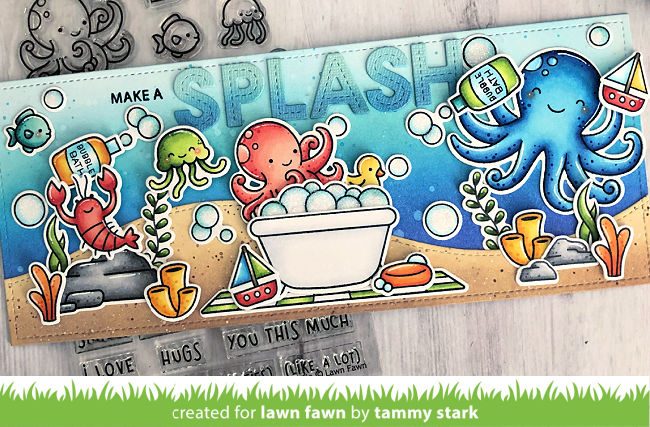
All of the stamped images were attached to the card, I used foam tape on some of them for dimension. I added Stickles Star Dust on the bubbles for a little sparkle. Next, I stamped the sentiment “make a” from Offset Sayings: Birthday in Black Licorice ink. To finish the greeting, I created the large “SPLASH” sentiment with Oliver’s Stitched ABCs die cut from Shimmer cardstock. I lightly inked the bottom of the letters with Blueprint Sketch ink before attaching them to the top center of my card. And then I attached the card front to a 3 ½ X 8 ½” white card base to complete my card.
Sea-son’s Greetings Card
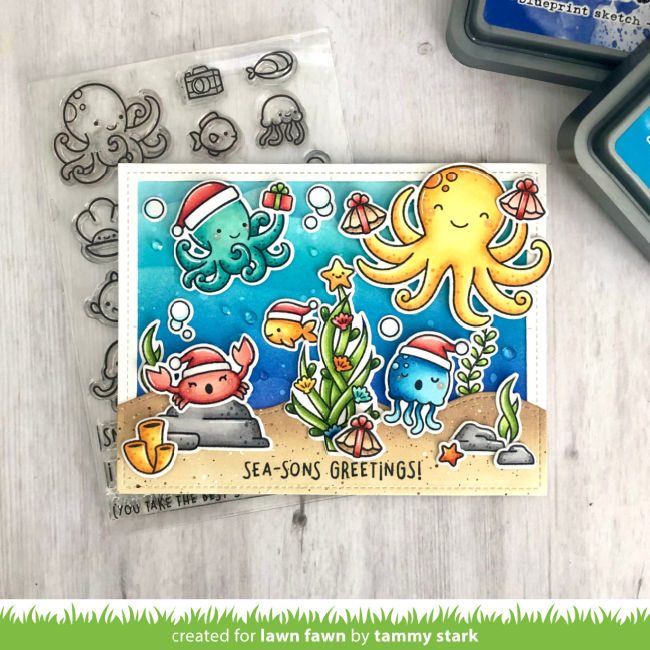
For this A2 sized card I cut a panel of Bristol smooth cardstock, and created the waves using the Ocean Waves Stencil. Starting at the bottom, I blended Blueprint Sketch, Mermaid Lagoon, Peacock Feathers, and Tumbled Glass Distress Oxide inks. I then splashed some water onto the background to create water droplets. Next, I cut a frame with the Foursquare Backdrop: Landscape, snipping away the grid to create an open frame to attach to my background. (Note: you could use a Stitched Rectangle Frame for this step.) To create the sand, I used the Stitched Simple Wavy Borders. I inked it with Antique Linen and Vintage Photo before attaching it to the bottom of my background popped up with foam tape.
Here’s a list of the images that I stamped, color with Copic markers and die cut for this card:
Ocean Shell-fie/ Coordinating Dies
Christmas Fishes/ Coordinating Dies
Yeti or Not (hat)/ Coordinating Dies
Mermaid For You (rock)/ Coordinating Dies
You are Sublime ( seaweed, coral)/ Coordinating Dies
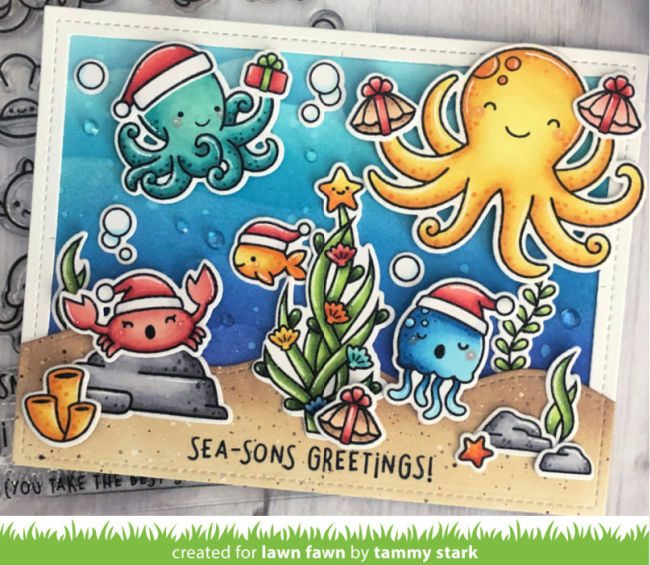
I arranged all the stamped images onto my card, using foam tape on some for dimension. Next I stamped the sentiment from, Christmas Fishes, along the bottom in Black Licorice Ink. And finally I added some Clear Water Droplets before attaching my card front to an A2 card base to complete my card.
Thanks so much for joining us today for 1 Stamp, 3 Ways! We would love to hear what sets you would like featured in the upcoming months. Please leave your suggestions in the comments below!
Big Hugs, Tammy
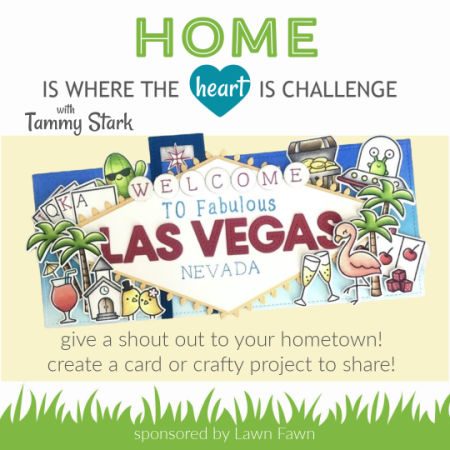
Be sure to check out Tammy’s “Home is Where the Heart is” challenge to create a project that represents your hometown! Click HERE for all the challenge details.
Thank you so much for sharing with us today Tammy! These cards are over-the-top awesome!
Supplies:

Thanks for visiting!
Have an amazing day!

I simply adore all ocean related cards and these are no exception. Love the christmas fishes stamp. 🐠🐙
The Sea-sons greetings set is one of my favorites no doubt, creative way to make a pirate ship too
These are awesome! Great tutorial on making the ship! Love it!
Ohhh Tammy beautiful cards 😍😍😍😍😍
Oh Tammy these are wonderful and fun cards. I am going to try and make the pirate ship I think my grandkids will love that. Thanks for the directions. I think every new card I see from you is my latest favorite LOL.
These are such great cards!!
This tutorial is really above the board! Or ship in this case! My goodness how exciting and I saw this on IG a few days ago, and they are all just spectacular! So much creativity that the Lawn Fawn fawnies have! SO IMPRESSIVE!!! I really enjoy posts like this; you get to see folks shine, and in this case, Tammy! Thanks so much for sharing!!!