
We have been busy preparing our Spring Release and we can’t wait to share it with you! Join us right here at the blog starting on Wednesday February 17 for Inspiration and Release Week leading up to Release Day on the 25th! We will have Design Team samples, intro videos and lots of giveaways!
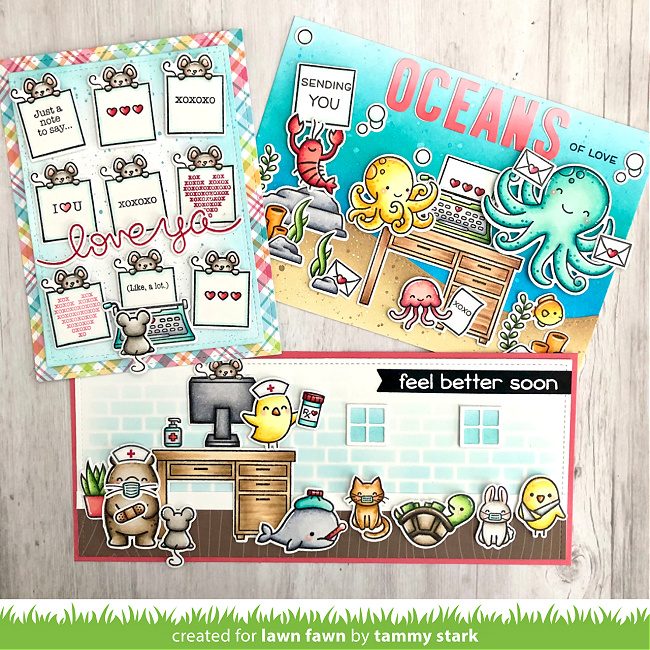
Happy Friday! Thanks for joining us today for another fantastic 1 Stamp, 3 Ways with Tammy! Today she will inspire you using You’re Just My Type to make 3 phenomenal cards! Take it away, Tammy!
Hi friends! I’m back with another 1 Stamp, 3 Ways! This month, we are featuring You’re Just My Type, a super adorable and versatile set!
Love Ya (like a lot) Card
I love a grid-style card, and these sweet mice make it 9 times cuter, lol!
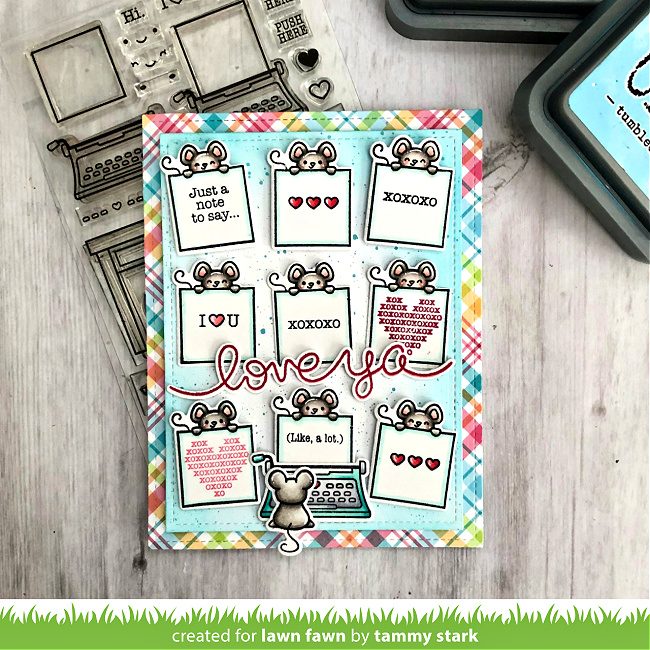
To begin, I cut a piece of Plaid patterned paper (sneak peek) using the largest Stitched Rectangle Stackables. Next, using the largest die from the Small Stitched Rectangle Stackables cut from the Spiffy Speckles Petite Paper Pack, I lightly inked the edges with Peacock Feathers Distress Oxide ink before adhering to the patterned paper with foam tape.
I stamped, colored with Copic markers, and die cut images from the following sets:
You’re Just My type/ Coordinating Dies
Love Poems/ Coordinating Dies
Big Scripty Words/ Coordinating Dies
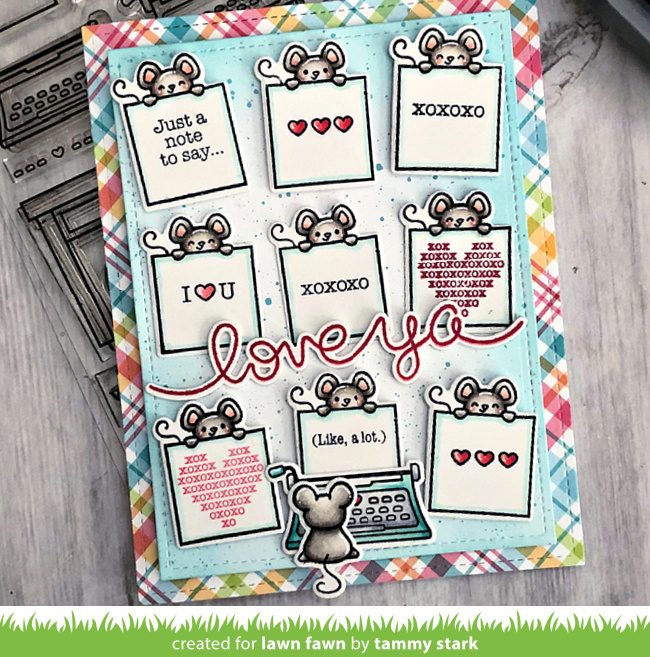
Next, I arranged my stamped images onto my card in a grid design, attaching the top and bottom images with foam tape for dimension. Lastly, I stamped the love ya sentiment from Big Scripty Words with Lobster Ink, die cut it with the Big Scripty Words – Lawn Cuts, and attached to my card to complete it.
Oceans of Love Card
These adorable underwater critters are busily making and sending love notes in this fun A6 card, measuring 4 ½ X 6 ¼”.
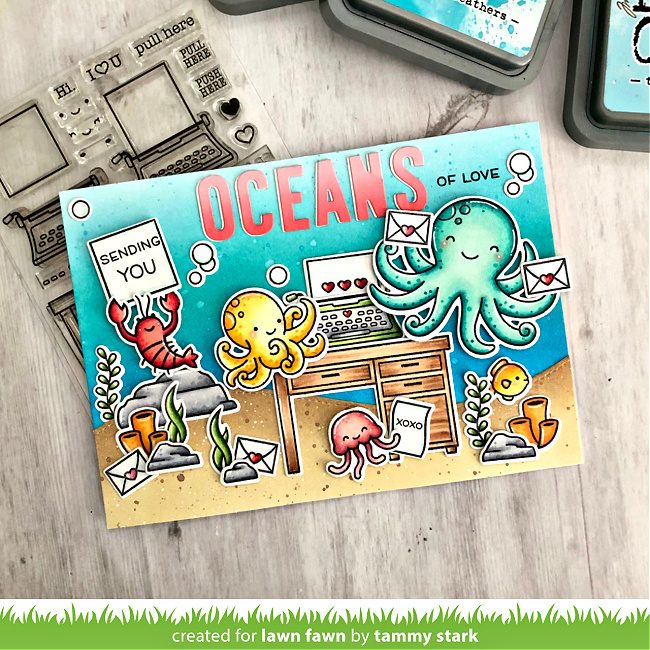
To begin, I cut a piece of Bristol Smooth cardstock to 4 ½ X 6 ¼”, and ink blended it with Mermaid Lagoon, Peacock Feathers, and Tumbled Glass Distress Oxide inks. I splattered some water and Mermaid Lagoon ink (mixed with water) onto my background to create interest.
Next, I cut a sandy border with the Slimline Stitched Hillside Borders and ink blended it with Antique Linen and Vintage Photo Distress Oxide inks. I splattered some Vintage Photo and white acrylic paint onto my border to create the look of sand, attached to my inked background and trimmed to fit.
I stamped, colored with Copic markers, and die cut images from the following sets:
You’re Just My type/ Coordinating Dies
Ocean Shell-fie/ Coordinating Dies
Mermaid For You/ Coordinating Dies
Special Delivery/ Coordinating Dies
You are Sublime/ Coordinating Dies
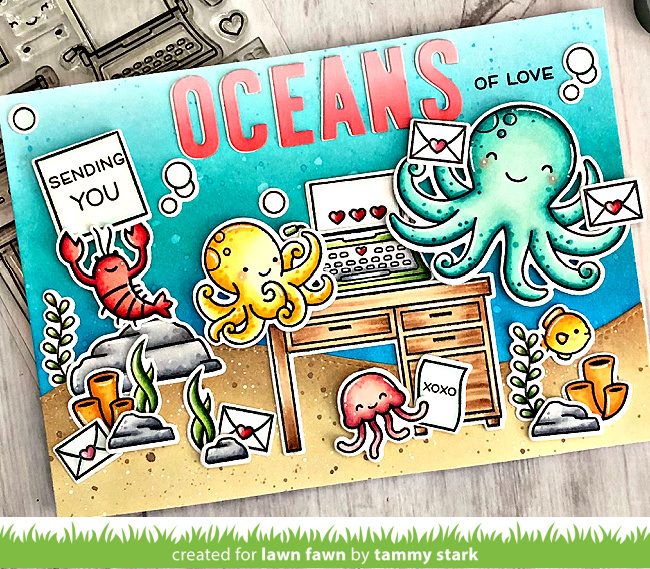
Next, I arranged all of the colored images onto my card, attaching some with foam tape for dimension. The sentiment was created using Cole’s ABCs and die cutting it two times from white cardstock.
I ink blended the letters with Spun Sugar, Worn Lipstick, and Festive Berries to give them a fun ombre look. And then, I layered them, slightly offset, onto the white die cut letters. The “sending you” and “of love” sentiments were stamped in Jet Black Ink from Special Delivery to complete my card.
Slimline Get-Well Card
These sweet critters are feeling a bit under the weather, but a visit to the doctor’s office should get them back on their feet in no time!
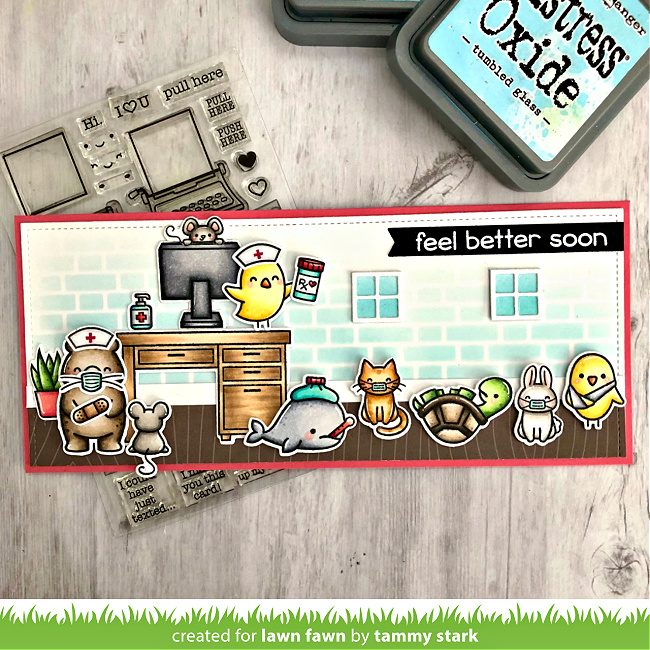
To begin, I die cut a piece of Bristol smooth cardstock using the Large Slimline with Sliders Die and lightly inked Peacock Feathers onto my background using the Brick Stencil. Next, I cut a 1”strip of the woodgrain paper from the Into the Woods – Sycamore Remix and attached to the bottom of my background. I then cut a thin piece of white cardstock and attached it on top of the woodgrain strip to create a baseboard.
I stamped, colored with Copic markers, and die cut images from the following sets:
You’re Just My type/ Coordinating Dies
Get Well Before N’ Afters/ Coordinating Dies
Screen Time/ Coordinating Dies
Simply Celebrate Summer/ Coordinating Dies
Germ Free Bear (limited edition set)
Say What? Masked Critters (limited edition set)
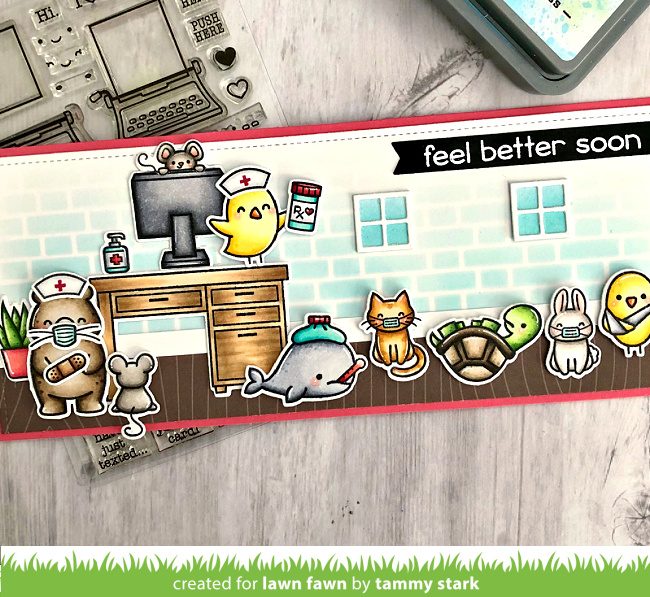
Next, I arranged all of the colored images onto my card, attaching some with foam tape for dimension. I added a couple of windows cut from the Build-a-House Die, then white heat embossed the sentiment from Get Well Before N’ Afters onto black cardstock die cut with the Everyday Sentiment Banners. Lastly, I attached the card front to a Guava cardstock slimline card base to complete my card.
Thanks so much for joining us today! I really hope you are inspired to create something unique and fun!
See you next month with another 1 Stamp, 3 Ways feature. As always, we LOVE your suggestions and ideas for upcoming features! Are there any fun things you would like to see created with dies? Or any sets you would like to see featured? Please leave your suggestions in the comments below!
Big Hugs, Tammy
A big thank you to Tammy for inspiring us with your amazing You’re Just My Type card designs!
Supplies:

Thanks for visiting!
Have an amazing day!
Oh my goodness I love all the creative uses of this stamp. Super cute cards Tammy. ♥️
So beautiful! TFS
Such adorable cards!
Thanks so much for sharing.
i love all of these! those mice are so cute. just love your creations.
Maybe a Hawk, Woodpecker, Eagle images would be nice.
Fabulous cards!!!
Release week is coming!! Yay!!
Great cards by Tammy!! I love the versatility of the sets she chooses … and I can see another mouse in the sneak peek image!!
Love the way all these images complement each other, the ocean scene is my fave!
I love these monthly features of 1 stamp 3 ways. It really make me look at my stamps differently. How about featuring an older set like Blue Skies or Critters On The Savannah. Love all your examples.