Lawn Fawn Video {8.3.23} Chari’s Fresh and Fruity Home Decor Project

Chari is back to inspire you with another creative project! This time she shows how to create a homespun wall hanging with Zesty Lemon, Cheery Cherries and Strawberry Patch! You can watch the video tutorial below or click HERE to watch at our YouTube channel.

Thank you so much for watching!


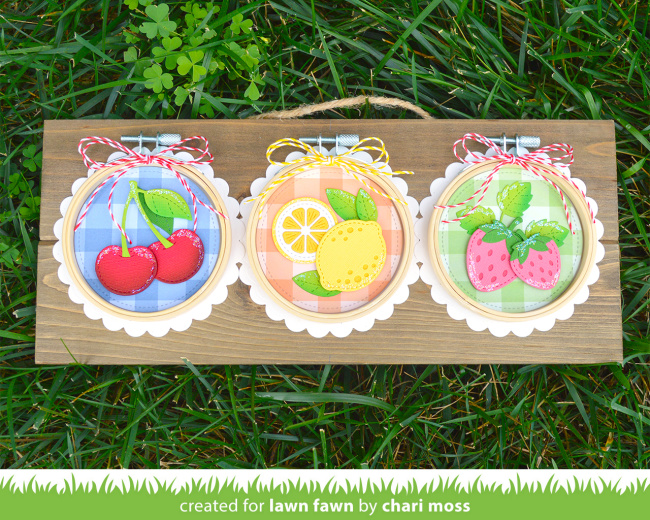
Chari created her project with 3″ wooden embroidery hoops that she layered on Scalloped Circles. She found the wooden plaque at a craft store.


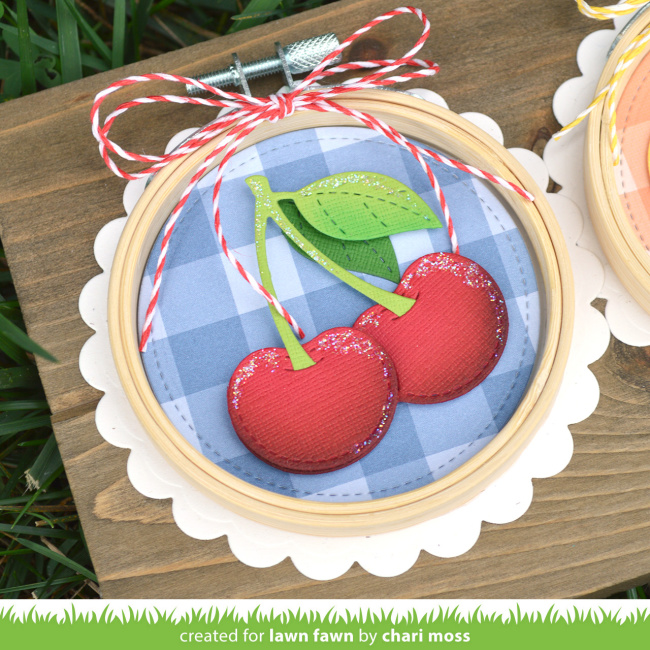
Chari arranged the fruity die cuts on Fruit Salad gingham paper. She added inky dimension to the Cheery Cherries before attaching them with glue and foam squares. The cherries look so perfect on the blue “Berry Cute” gingham.


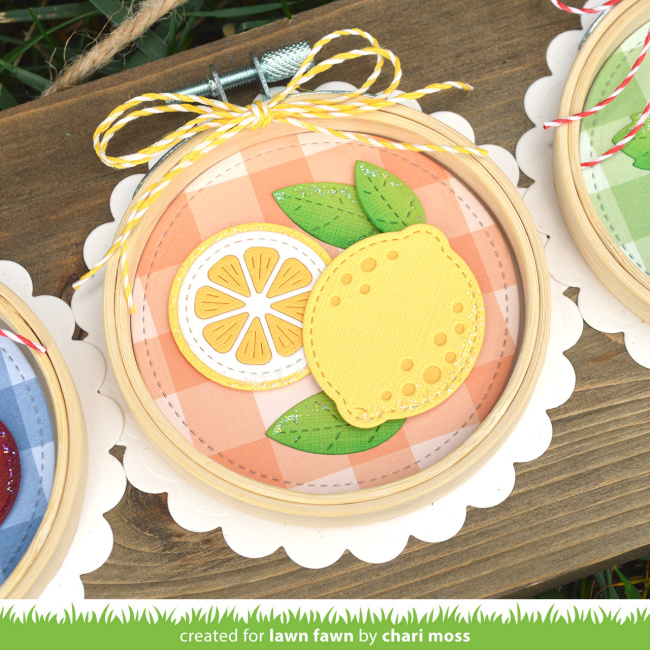
For the center hoop, Chari placed the Zesty Lemon on “Orange You Glad” gingham.


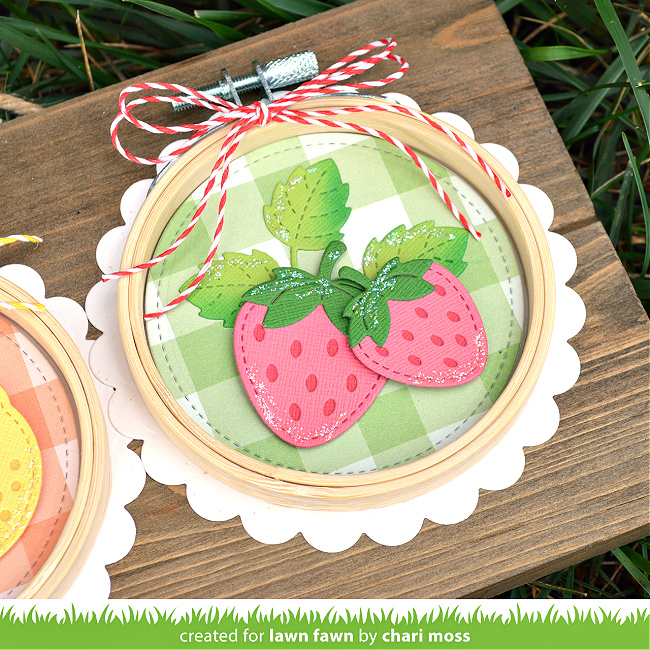
And then she arranged the Strawberry Patch berries on “Perfect Pear” green gingham. The gingham gives this sweet project a farmhouse vibe!


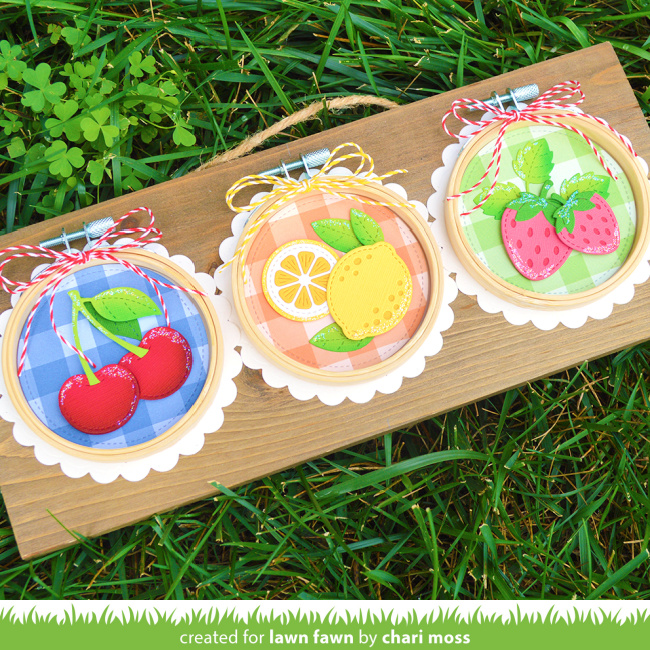
Hang it in your kitchen or gift it to a friend! Have fun recreating this beautiful project!

Thank you so much for this beautiful project idea, Chari! I absolutely love it!
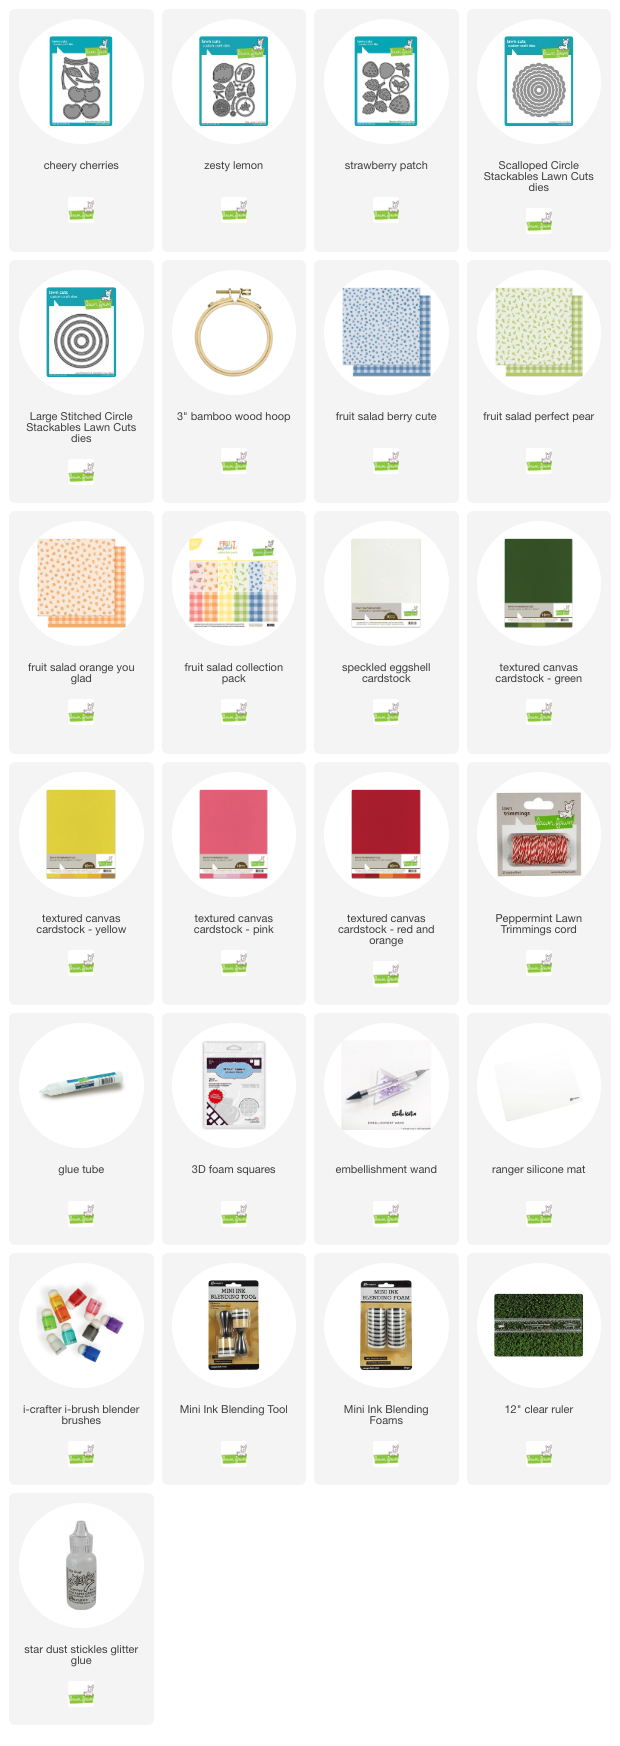
Supplies:

Thanks so much for visiting, have an amazing day!

A Pair of “Cherrific” Cards with Grace Featuring Cheery Cherries!


Save the Date! Our next Create with Us Live is on July 12th! We can’t wait to talk all things crafty while making cards with new Summer 2023 sets! Make plans to join Kelly Marie and Jenn, it will be so much fun! You will find all the details to craft along with us, HERE.


Grace‘s Cheery Cherries cards are a perfect summer treat! With charming puns, pretty gingham and shiny cherries these designs will definitely delight the recipient!


Grace created this charming design with a Fruit Salad gingham from the petite pack as the background. Then she layered a kraft Fancy Scalloped Circle and a Stripes ‘n Sprinkles circle with the shiny pair of cherries on top! She added a tiny pink bow from Put a Bow on It and Simple Wavy Banner.


Then she created the punny sentiment with Claire’s ABCs and Henry’s ABCs. She stamped the letters with Crunchy Leaf ink. For all the cherries, Grace used a sponge dauber to add Guava ink to the cherries cut from Ballet Slippers cardstock. Then she built up the color and shading with Lobster and Cranberry inks. She added the same inky colors to the Henry’s ABCs.

Finally, the letters and cherries got a coat of shine as Grace gave them two layers of embossing with clear embossing powder. So shiny and so clever!


And how adorable is this Platform Pop-Up basket of Cheery Cherries! Grace used Fruit Salad So A-Peel-ing 12×12 paper for the base and the Platform Pop-Up Hillside Wrap Around. She added another gingham piece from the 6×6 pack to line the “basket”. Then she cut a Stitched Circle Frame for the basket handle, topping it off with another bow from Put a Bow on It!


Grace stamped the sentiment on a stitched banner from Heart Garland Backdrop: Portrait, again using Claire’s ABCs. She added “you’re” from Tea-rrific Day.


The cherry stems were die cut from Cilantro cardstock and shaded with Rainforest ink. I love how Grace arranged all the beautiful cherries in the Platform Pop-Up, creating dimension and the look of a full basket of Cheery Cherries.

Oh, my goodness, Grace, your cherry cards are so amazing! Thank you so much for sharing this wonderful inspiration with us!

Supplies:

Thanks so much for visiting, have an amazing day!

Lawn Fawn Video {6.27.23} Caly’s Cheery Cherries Magnetic Card and Tag!

Caly has another unique card design to share with us! For today’s video, she created a Cheery Cheeries card and tag with a magnetic secret! You can watch the video below or click HERE to watch at our YouTube channel.

Thank you so much for watching!


Caly started this amazing design by die cutting the Cheery Cherries from white cardstock. Then she used Lawn Fawn inks to add color to the cherries, leaves and stems. She arranged them on a panel of white cardstock which she layered onto a Fruit Salad gingham panel tucking a thin 5/8″ craft magnet between them.

For the tag, Caly die cut a Stitched Circle Tag and a Fruit Salad Scalloped Circle. Then she attached them with thin foam squares, adding another thin magnet. Now the tag will hold securely to the card, hiding another part of the sentiment underneath!


Caly swapped out the word “berry” from the sentiment in How You Bean Strawberries Add-On with Henry’s ABCs spelling “cherry”! Then she added another sentiment from the Strawberries Add-On set on the tag!

Thank you so much for this super fun inspiration, Caly! I love the magnet detail, it’s so clever!

Supplies:

Thanks so much for visiting, have an amazing day!