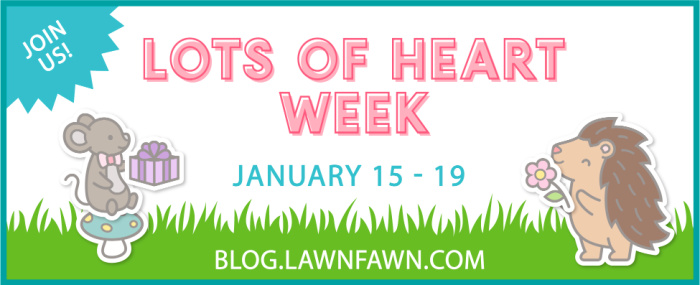
Be sure to join us here at the blog January 15 – 19 for a special week of inspiration! It will be a very heartwarming week!
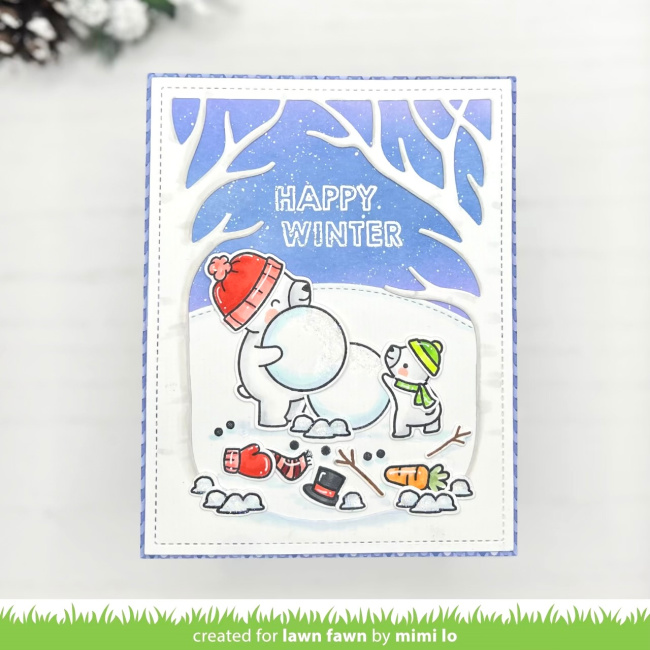
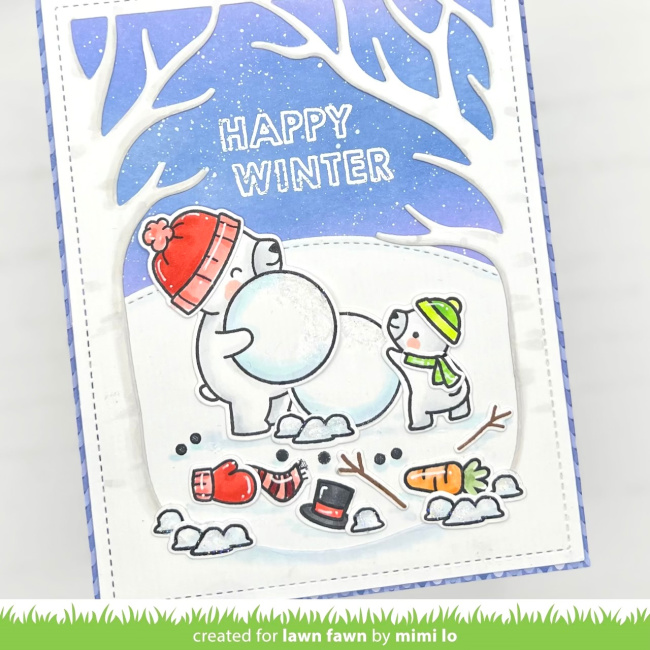
Mimi joins us today with a super cute and clever Little Snow Globe: Bear card! This charming design is perfect for snowy winter days!
Mimi altered the Little Snow Globe: Bear stamp by masking the base of the snow globe to start the makings of a snowman! Then she used the circle stamp from Reveal Wheel Circle Sentiments to finish the masked part of the snow globe. She also used the circle for the bottom part of the snowman. She added a snowman building buddy from Snow Much Fun. Then she shopped her stash to find all the elements for decorating a snowman!
To set the snowy scene, Mimi ink-blended the background with Shaded Lilac and Stormy Sky Distress Oxide ink. She used Spooky Forest Backdrop, cutting off the grass and shading the trees and snow. For the snowbank she cut a Stitched Hillside Border, layering it and the backdrop on the inked panel. And then Mimi white heat-embossed the greeting on the background and assembled the cute snowman scene!
Thank you so much for sharing this creative card design, Mimi! It’s so much fun!
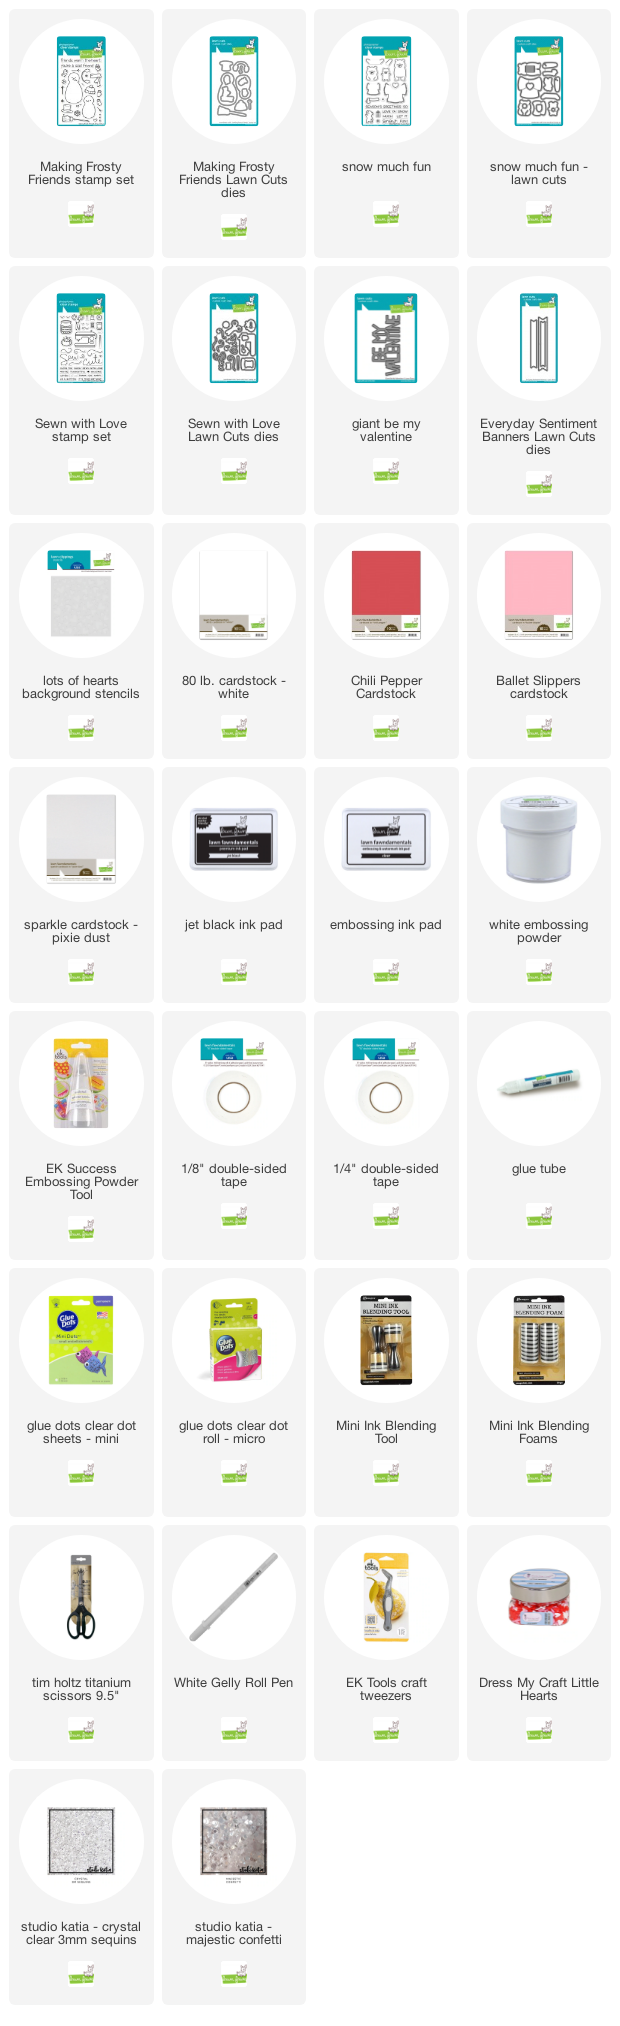
Supplies:
Thank you so much for visiting the Lawn Fawn blog, have an amazing day!
Hello friends! Welcome to another special Fawny Holiday Week! We will be sharing inspiring holiday projects by our amazing Fawny family of designers along with videos and daily giveaways! Comment below for a chance to win a stamp set with coordinating dies and a 6×6 paper pad of your choice!
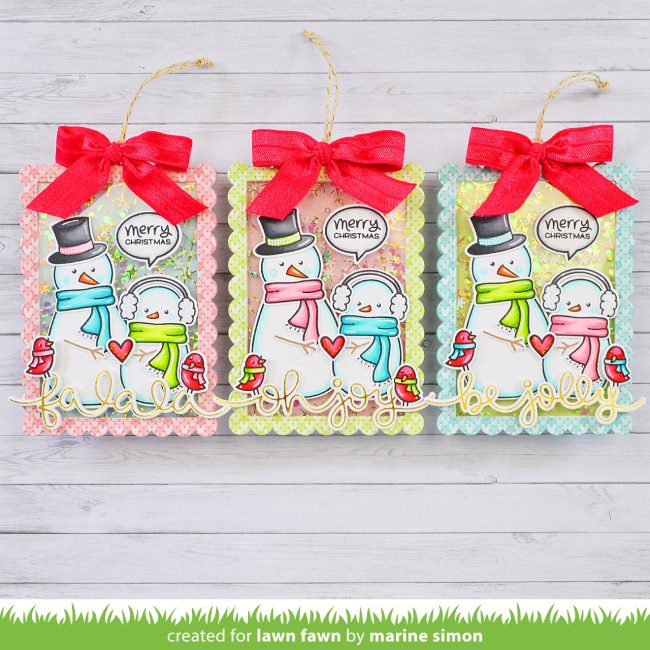
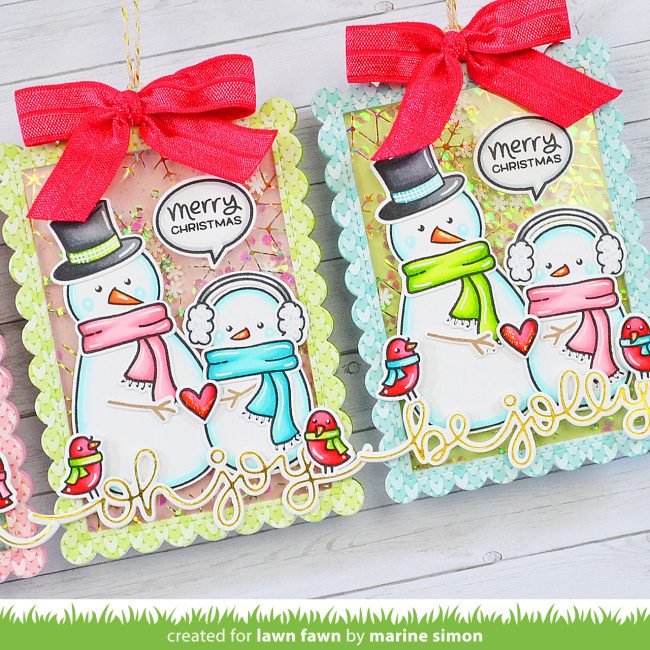
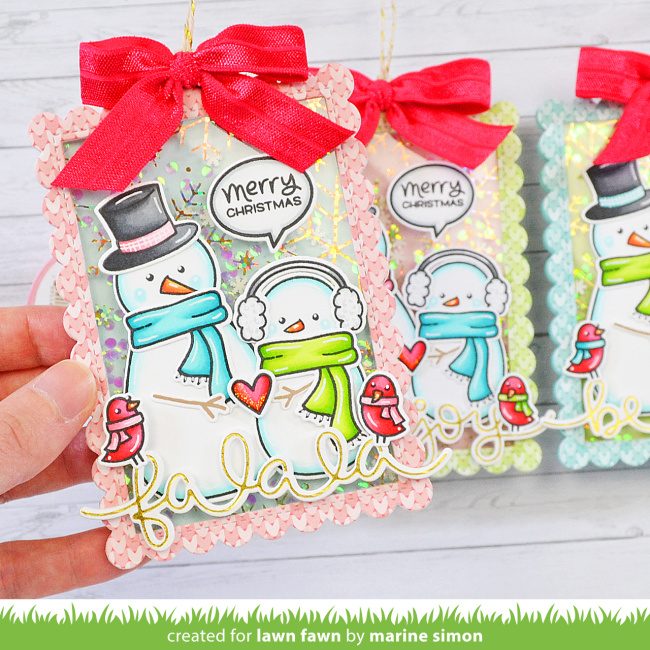
We have another fantastic video for you today! Marine shares festive shaker gift tags featuring the adorable snowmen of Making Frosty Friends! You can watch the video tutorial below or click HERE to watch at our YouTube channel.
Thank you so much for watching!
Marine shows how to create these beautifully festive tags or ornaments in an assembly line style. Be sure to watch the video tutorial for all the how-tos!
The adorable Making Frosty Friends set has been a holiday and winter favorite since it first released in 2011! Marine paired her sweet snowmen with a speech bubble and greeting from Say What? Christmas Critters!
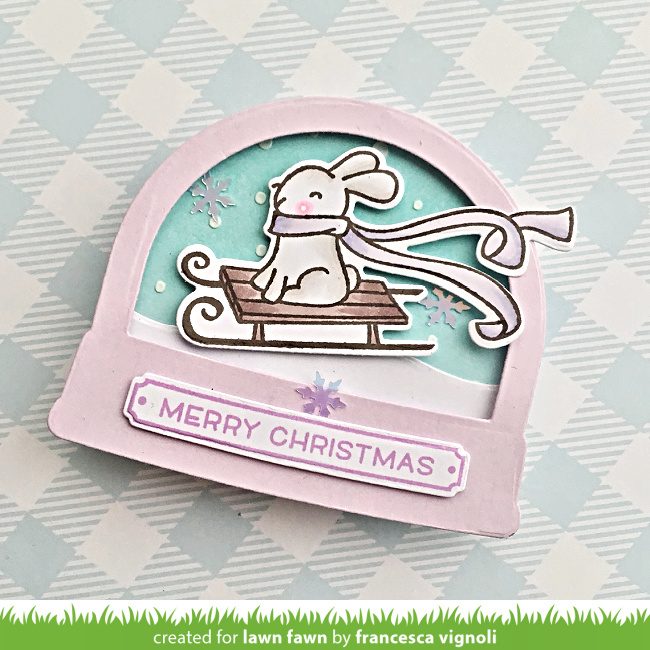
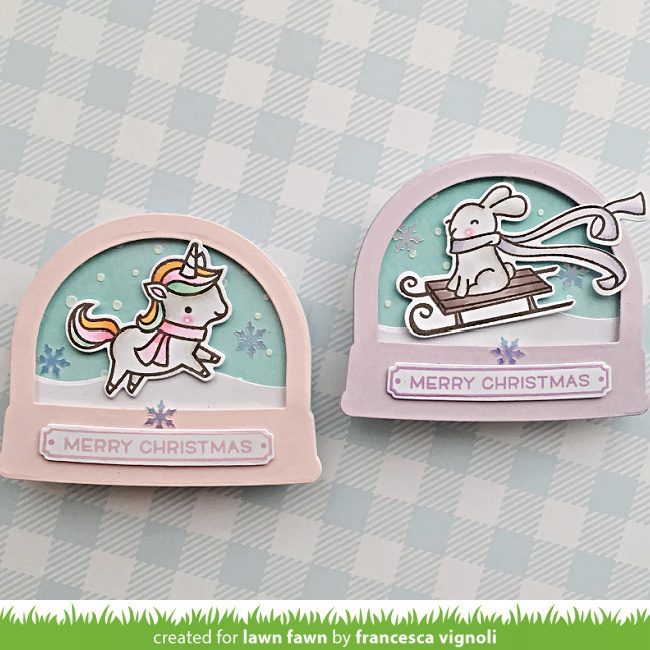
Franci‘s snow globe shaped card features another beloved older set! Winter Bunny is the first in our series of cute winter critters mini sets! With her scarf flying behind her she is having so much fun sledding down a frosty hill! For the snow globe shape, Franci used Ready Set Snow Shaker Add-On!
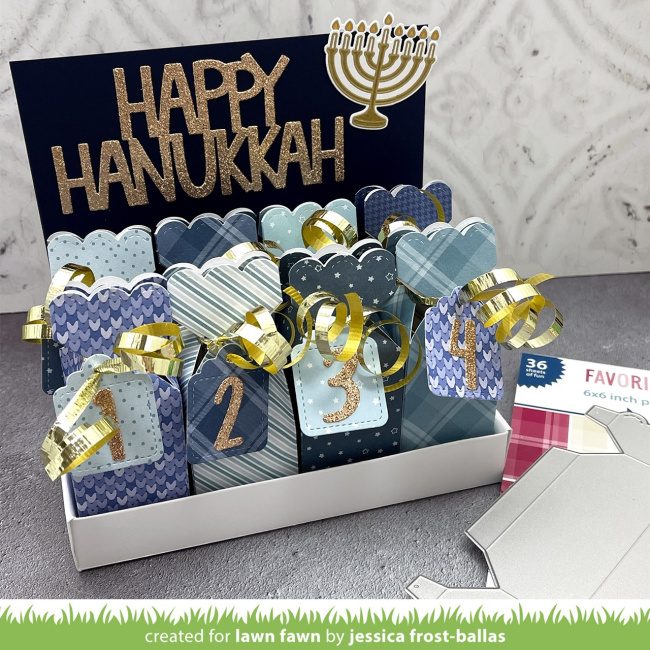
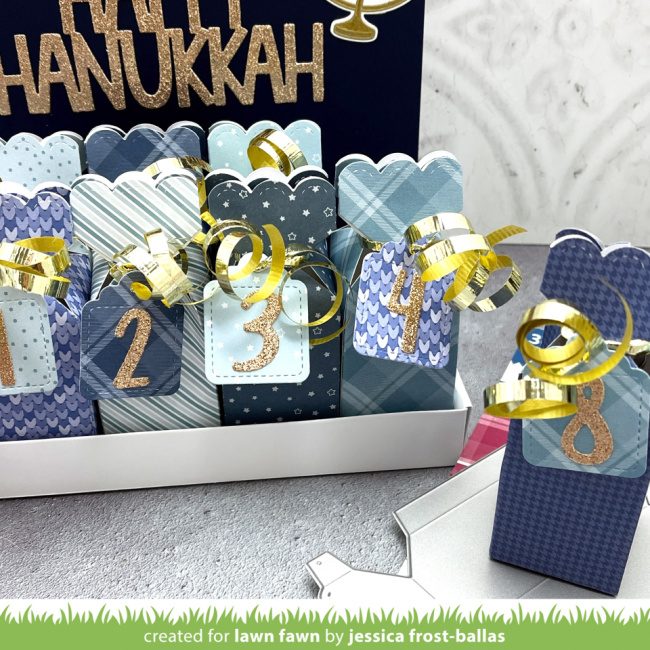
Jessica‘s brilliant packaging is a special way to share gifts over the eight days of Hanukkah! She altered the Candy Box, closing one end so the boxes will stand up. Then she added a Tiny Tag labeled with Henry’s 123s.
Next, she created a flat box that is 3.5″ x 6.5″ to hold the candy and small treat filled boxes. Then she decorated a panel of cardstock with a glittery Giant Happy Hanukkah and a gold-embossed menorah from Love You a Latke!
I love how Jessica combined blue patterned papers from a variety of paper collections!
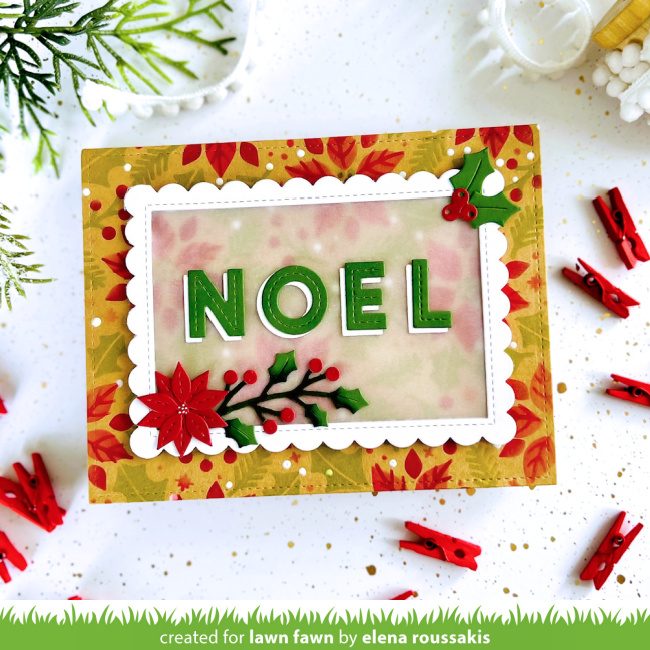
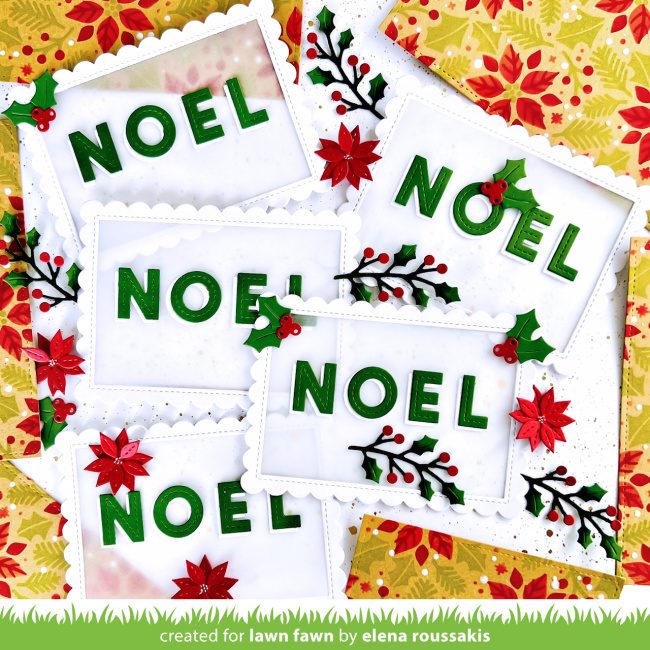
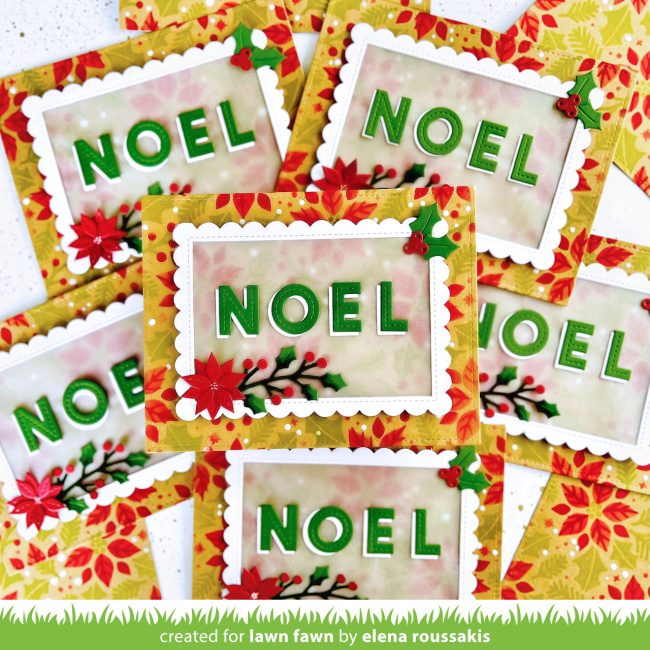
This is another design that can easily be created assembly line style. Create all the stenciled panels, and die cut the scalloped frames, adding the vellum. Then die cut the letters, poinsettias and holly leaves. All the elements will then be ready to assemble into beautiful holiday cards!
Giveaway time!
I hope you have enjoyed this fun look at some of our Holiday and Winter sets. Tomorrow, we will have another fun Fawny Holiday celebration but for now, it’s giveaway time! Leave us a comment sharing a crafty holiday project or gift you are working onby November 17th at 5:00PM ET. We will randomly pick one winner for a stamp/coordinating dies set plus a 6×6 paper pad of their choice! If you post about our Fawny Holiday Week on social media, leave another comment for a second chance to win!
Make sure to come back tomorrow, Wednesday, November 15 for our next Fawny Holiday Week post! We hope you guys love this week!
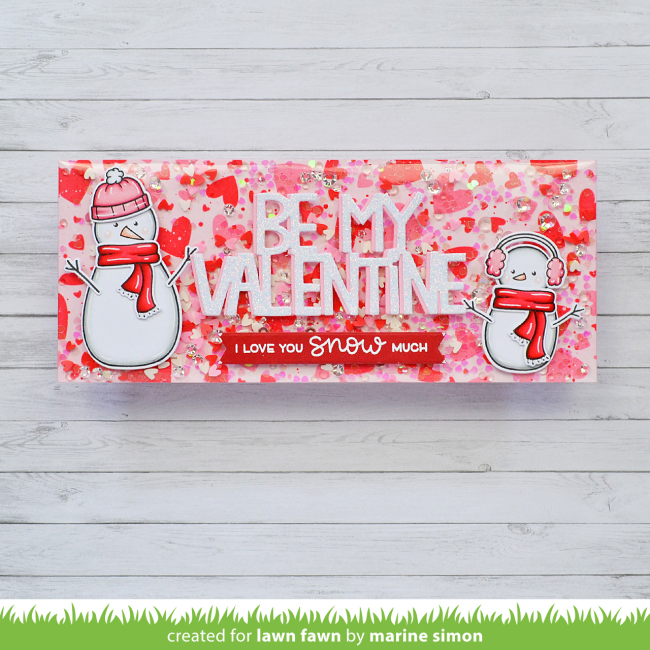
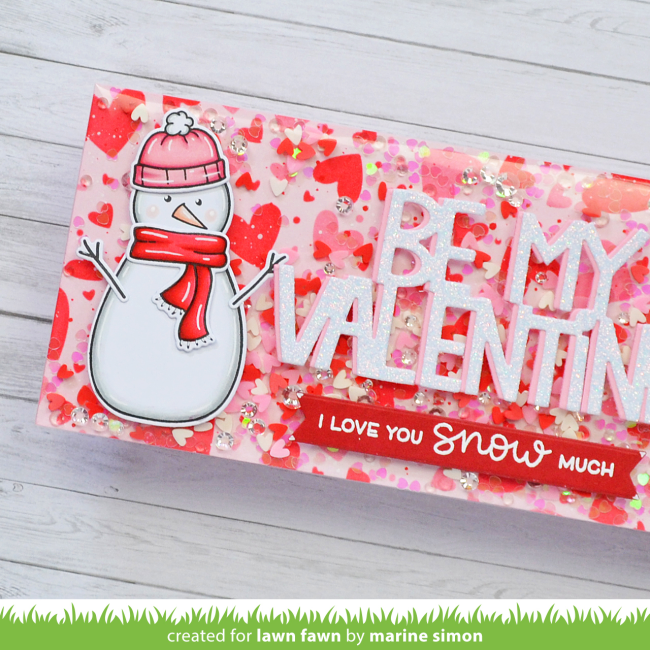
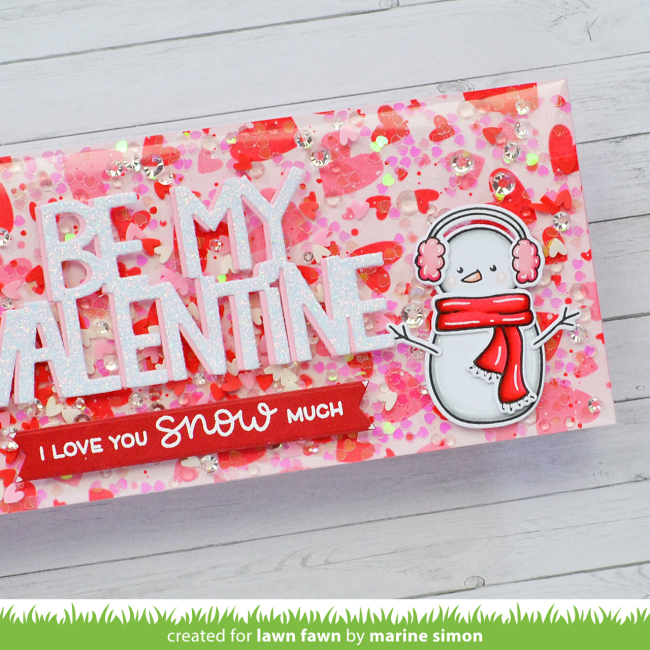
Marine is back today with another brilliant design! Today she shares a beautiful infinity shaker card! You can watch her video tutorial below or click HERE to watch at our YouTube channel.
Thank you so much for watching!
Marine’s beautiful shaker uses the fun infinity shaker design! Also known as edge-to-edge, this shaker style is trendy now! She filled the background with pink and red hearts with the help of Lots of Hearts Background Stencils! With the addition of Dress My Craft hearts and sparkly confetti, Marine’s shaker design is so much fun!
To create the custom sentiment, Marine combined phrases from Sewn with Love and Snow Much Fun! Since our sentiment stamps are rectangle shaped, it’s really easy to line up phrases from different sets! Be sure to shop your stash the next time you want to add a custom sentiment!
Thank you so much for sharing this delightful Valentine design with us, Marine!