It’s time for a new 1 Stamp, 3 Ways with Tammy! You voted on Instagram to choose the stamp set for this month and Hay There is what you chose! Her cards are so adorable and you might see a little sneak peek of something new releasing soon!
Hi Friends, Tammy here with 1 Stamp, 3 Ways, featuring one of my favorite sets, Hay There. I absolutely LOVE this set and had so much fun designing this card trio!
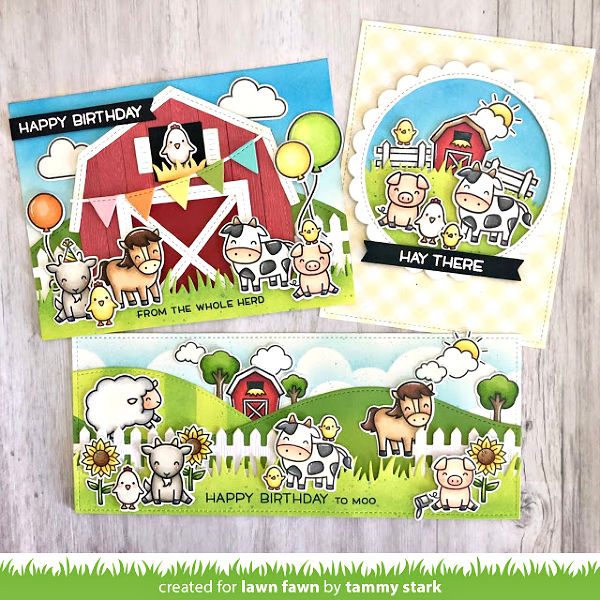
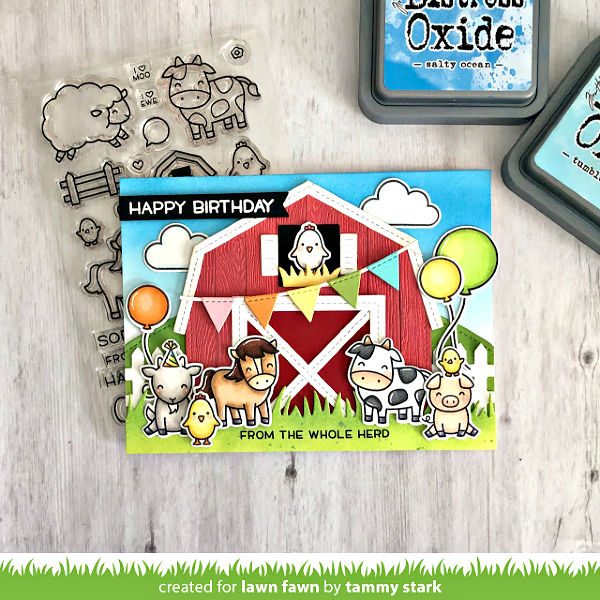
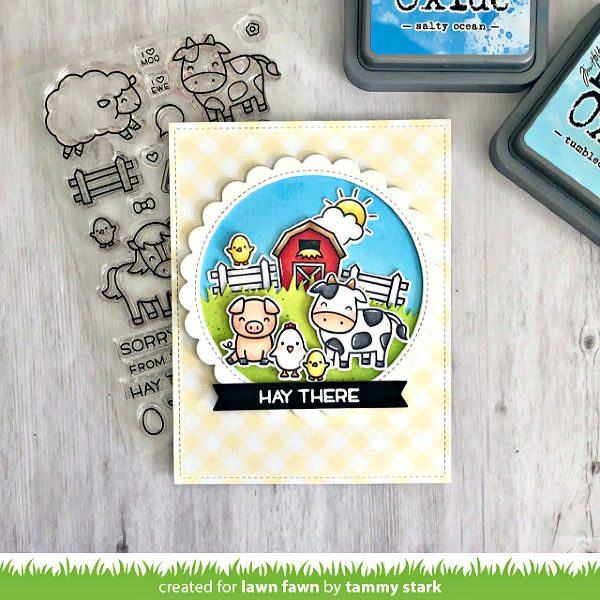
The Barn Card
The first card I created is an A6 card, measuring 4 ½ X 6 ¼”. This card features a custom barn, that I will show you how to create using Lawn Fawn dies.
To begin, I cut a panel of Bristol smooth cardstock to 4 ½ X 6 ¼’, and ink blended with Salty Ocean and Tumbled Glass Distress Oxide inks. Next, using the Simple Stitched Hillside Borders, I cut a hillside from Cilantro Cardstock and attached it to the inked background. I then cut a fence from white cardstock using the Picket Fence Border and glued that on top of the hill.
I stamped, colored, and die cut images from the following sets:
Hay There
Really High Five (balloons, party hats)
Butterfly Kisses (clouds)
How to create the barn
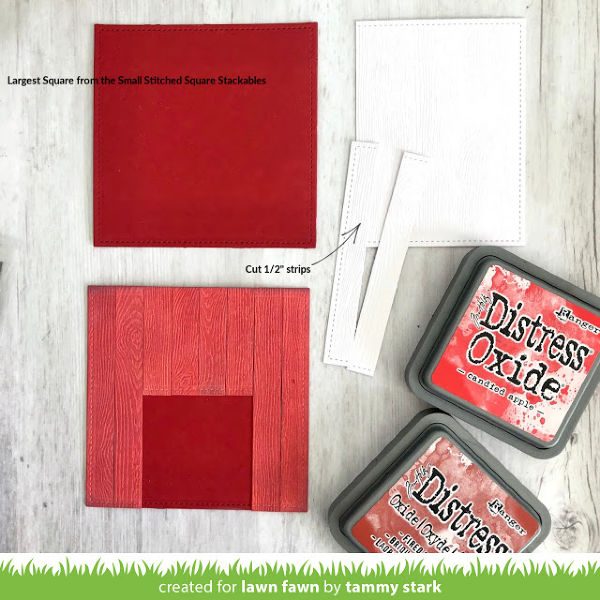
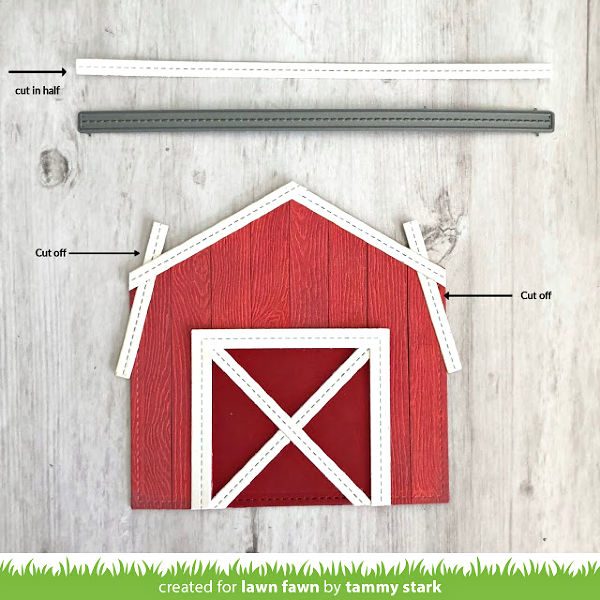
To begin, I used the largest die from the Small Stitched Square Stackables, and cut 2 squares, one from Chili Pepper cardstock, and the white paper from the Woodgrain cardstock. Then I cut the white woodgrain square into ½” strips and inked each strip with Distress Oxide inks. I attached the 4 longest strips (2 on each side) onto my Chili Pepper square. I cut the other strips in half and attached to the square as shown in the photo.
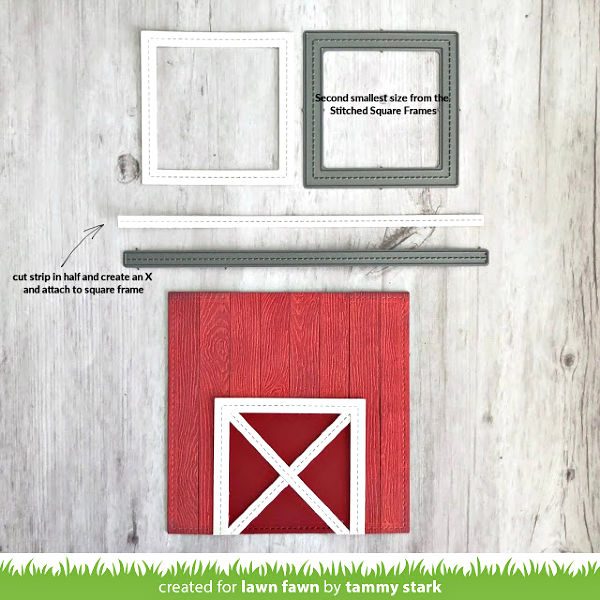
Next, I cut a white frame using the second smallest die from the Stitched Square Frames. Then I used a white stitched strip from the Picket Fence Border set, to create an “X”.
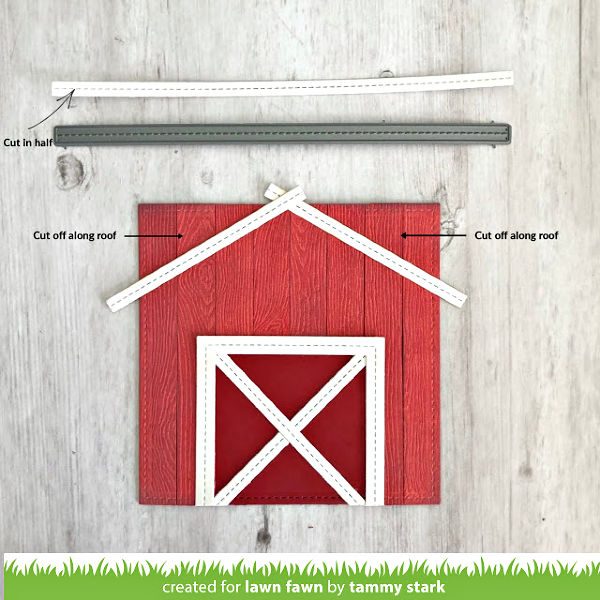
I cut another white strip, using the Picket Fence Border and cut it in half and attach it to the square, as shown in the photo. Then I cut off the excess, following along the roof line.
I cut another white strip using the Picket Fence Border and cut it in half. I lined it up on each side on an angle and trimmed the excess.
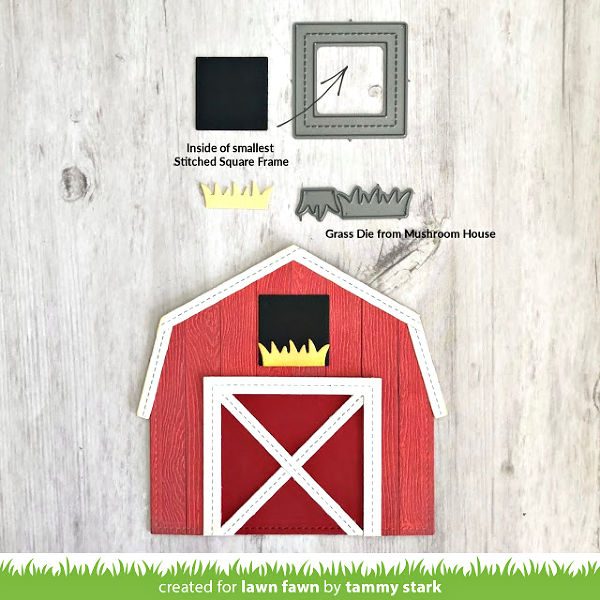
The window above the bard door starts with the smallest die from the Stitched Square Frame set. The “hay” is the grass from the Mushroom House set cut from Sticky Note cardstock. I lightly inked the edge of the hay with Mustard Seed Distress Oxide ink, then attached it to the window.
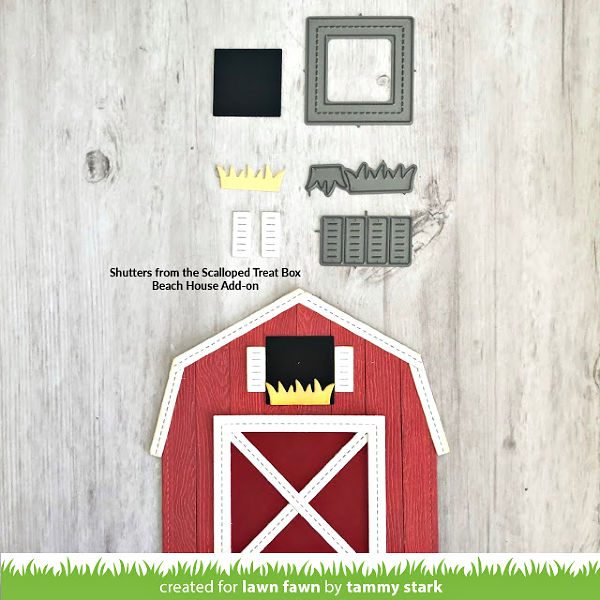
I cut little shutters from the Scalloped Treat Box Beach House Add-on to add the finishing touch to the barn.
Finishing the card
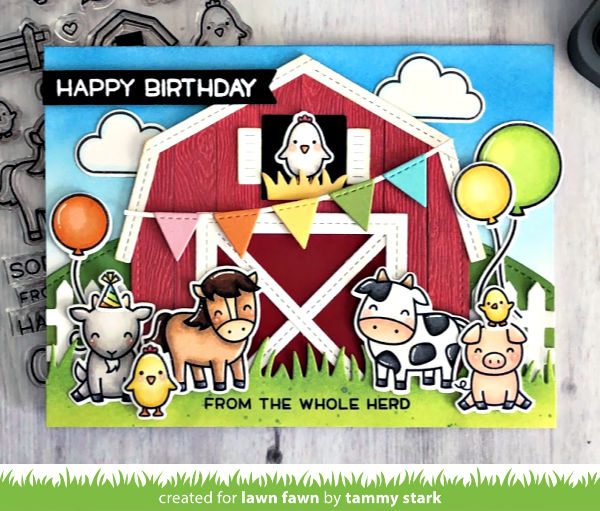
I attached the barn in the center my card. Next, I cut a strip of Bristol smooth cardstock using the Grassy Border die and ink blended it with Twisted Citron and Mowed Lawn Distress Oxide inks. Then I splattered it with Mowed Lawn ink mixed with water, stamped the sentiment and used foam tape to add it to the bottom of the card. And finally I layered on all my colored images, using foam tape for dimension.
I used Bunting Borders to create the cute banner on the barn. I die cut the flags from the reverse side of Pastel and Tropical Shimmer cardstock. Then I finished the card by white embossing the birthday greeting on a black Everyday Sentiment Banner trimmed on one side.
Circle Frame Scene Card
The second card starts with a Stitched Rectangle panel of plaid gingham paper on an A2 card base. I cut a white Stitched Scalloped Circle Frame three times then glued the 3 frames on top of each other. Then I cut two of largest Outside in Stitched Circle Stackables. I ink blended one with Salty Ocean and Tumbled Glass Distress Oxide inks for the sky. Then I die cut other stitched circle with the curved grassy hill with the Mushroom Border, ink blending with Twisted Citron and Mowed Lawn Distress Oxide inks, like the first card.
I stamped, colored, and die cut images from the following sets:
Hay There
Happy Village (sun)
Next, I attached the grassy border to my background and layered the stacked scalloped frames on top. I attached the colored critter images with foam adhesive onto the scalloped circle to create a mini farm scene. I attached the scalloped circle to my gingham background with tape runner. Then I finished off my card by white embossing the sentiment onto black Everyday Sentiment Banner.
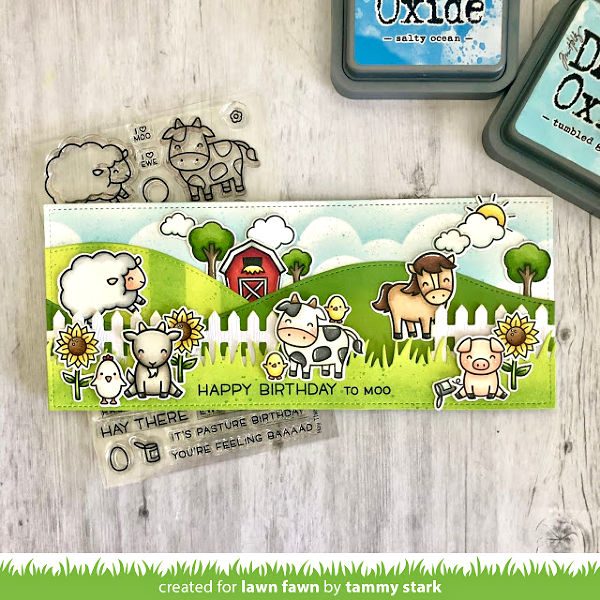
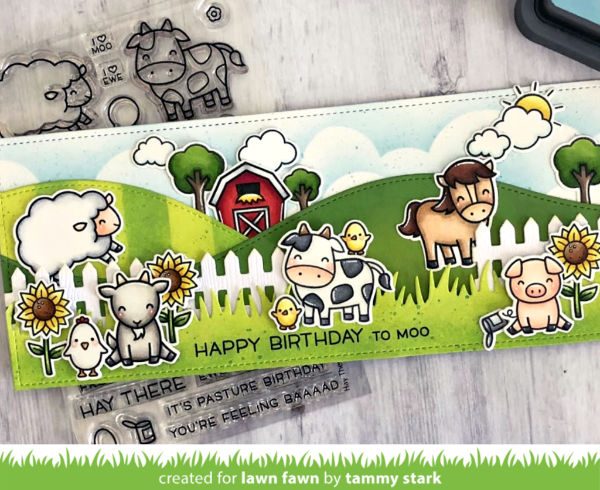
Slimline Farm Scene Card
For my final card, I cut a piece of Bristol smooth cardstock to 3 ½ X 8 ½”. I created a cloudy sky using the Cloudy Stencil with Broken China Distress Oxide ink. I splattered some watered down Broken China ink into my cloudy background for some interest, and set aside to dry. Once dry, I attached to a 3 ½ X 8 ½” white card base.
Next, I stamped, colored, and die cut images from the following sets:
Hay There
Happy Village (trees, clouds, sun)
Happy Harvest (sunflowers)
Next, using Slimline Stitched Hillside Borders, I cut two borders (one from Bristol smooth cardstock and one from Cilantro cardstock). Then I ink blended with Distress Oxide inks (Twisted Citron, Mowed Lawn) using masked strips to make it look like freshly mowed grass. I blended Mowed Lawn ink along the border of my stitched hillside and attached both grassy hills to my card. Then I cut a Picket Fence Border using the white Woodgrain cardstock and attached it over the grassy hills.
I cut a Grassy Border, and once again, ink blended Twisted Citron and Mowed Lawn Distress Oxide inks onto it. And then, I stamped the sentiment on the grassy border and used foam tape to add it the card. With the farm background complete, I attached the images, adding foam tape for extra dimension.
Thanks so much for joining us today for 1 Stamp, 3 Ways! Be on the lookout for another poll on Instagram Stories to vote on next months featured set…please leave your requests in the comments. We would love suggestions for upcoming featured sets!
Big Hugs,
Tammy
Copic Colors:
Goat: W4, W2, W1, W00, N4, N2, R20
Chicken/Chicks: Y15, Y13, Y11, Y00, R29, R14, Y14, W00, W1
Horse: E31, E30, E53, E51, E50, E23, E25, E59, N2, N4, R20
Cow: W0, N2, N4, E34, E31, R30, E00, E000
Pig: R30, E00, E000, E0000, R20, N2, N4
Balloons: YR04, YR12, YR00, Y15, Y11, Y00, YG03, YG01, YG00
Supplies:

Thanks for visiting,
Have an amazing day!